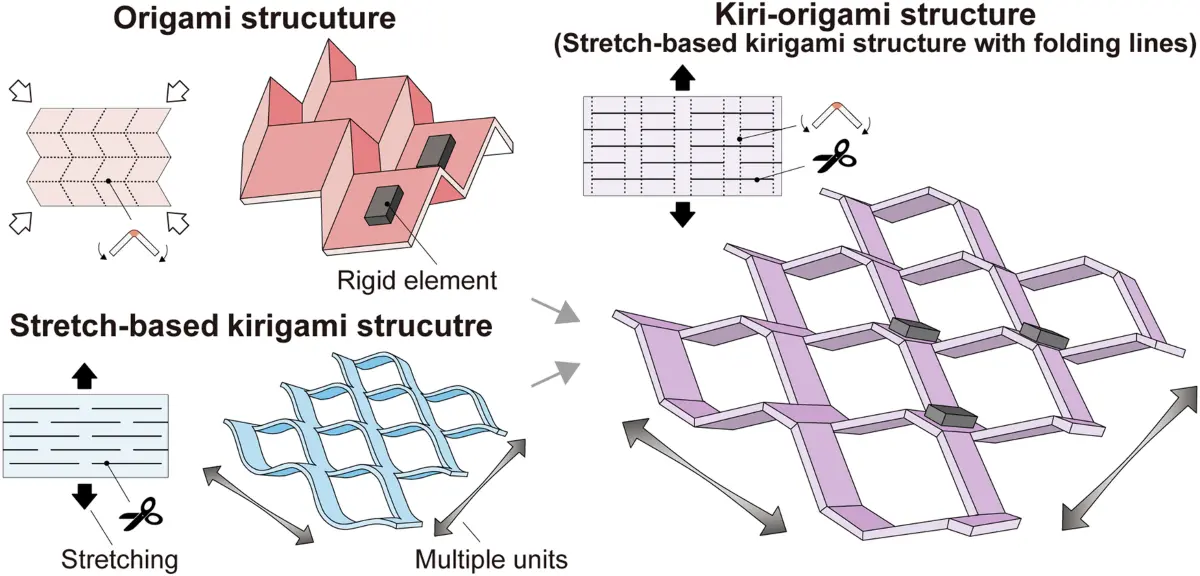
The first time I opened a real origami diagram book, I stared at a page full of dashed lines and curved arrows and had no idea what any of it meant. I almost closed the book right there, and if you're feeling that same confusion right now, this guide on how to read origami diagrams is exactly what would have saved me a week of frustration.
This article is Part of Getting Started with Origami, and it breaks down every symbol, line, and arrow you'll see in a typical diagram, so you can stop guessing and start folding with confidence.
Why Origami Diagrams Look So Confusing at First
Origami diagrams aren't written in plain English on purpose. They use a visual language instead, made of lines and arrows that show you exactly what to do without needing a paragraph of instructions for every single fold.
This system is called the Yoshizawa-Randlett notation. It was created by a folder named Akira Yoshizawa and later standardized by Samuel Randlett and Robert Harbin, and it's still the system almost every origami book and app uses today. Once you learn its handful of core symbols, you can pick up a diagram in nearly any language and still know exactly what to do.
I still remember folding my first crane from a diagram with zero written instructions, just symbols. It felt impossible until the lines started clicking into place, and then it felt like reading a secret code I suddenly understood.

Photo Credit: lil artsy
What You Need Before You Start Reading Diagrams
You don't need much to start practicing diagram reading. A few basics make the learning curve much smoother.
|
Item |
Why It Helps |
|
A diagram book or app |
Gives you real symbols to practice reading |
|
Practice paper |
Lets you fold along instead of just reading |
|
Pencil |
Useful for marking your place on longer diagrams |
|
Good lighting |
Fine dashed lines are easy to miss in dim light |
|
A flat table |
Keeps your paper steady while you check each symbol |
I'd recommend starting with a beginner diagram book instead of jumping straight into advanced ones online. Beginner books tend to space their symbols out more clearly, which makes the origami diagram symbols much easier to spot at first glance.
The Origami Symbol Legend: Lines and What They Mean
Every diagram is built from a small set of line types. Once you memorize these, you can follow almost any traditional or modern diagram without much trouble.
|
Line Type |
What It Looks Like |
What It Means |
|
Valley fold |
Solid, dashed line |
Fold the paper toward you, like a valley |
|
Mountain fold |
Dash-dot-dash line |
Fold the paper away from you, like a peak |
|
Existing crease |
Thin solid line |
A fold you already made earlier in the steps |
|
Fold and unfold |
Solid line with small arrows |
Fold the paper, then open it back up |
|
X-ray line |
Dotted line |
Shows a hidden edge underneath a layer |
Valley and mountain folds are the two most basic moves in origami, and almost every model relies on both. A valley fold bends toward you, creating a dip like a valley, while a mountain fold bends away from you, creating a ridge like a mountain peak. Diagrams always use a different line style for each one, so you can tell them apart without any written labels.
Dotted or dashed lines show up constantly and confuse a lot of beginners. A dotted line usually marks a hidden edge that's tucked underneath a layer of paper, something you can't see from the top but still need to know is there. A dashed line, on the other hand, is typically showing you where a fold line will go before you actually make the fold.
If you want a full printable reference with every symbol laid out side by side, the Origami Symbols & Diagram Legend page covers the complete set in more detail than we have room for here.
Understanding Arrows in Origami Diagrams
Lines tell you where to fold. Arrows tell you what to do with that fold, and getting comfortable with them is a huge part of learning how to read origami diagrams quickly.
Here's what the most common arrow types mean:
- Straight arrow – Fold the paper in the direction the arrow points, usually along a valley or mountain line shown right next to it.
- Arrow with a half circle – Fold the paper and then unfold it back to flat, leaving just a crease behind.
- Double-headed arrow – Fold the paper, then fold it back the other way, sometimes multiple times in a row.
- Arrow pointing into a pocket – Tuck one part of the paper into a hidden flap or pocket, common in bases like the bird base.
- Arrow with a small circle at the end – Push or press the paper inward at that exact spot, often used for reverse folds.
Reading these arrows takes practice, but it clicks faster than most people expect. I usually tell beginners to fold slowly through their first two or three diagrams, checking each arrow twice before committing to the fold.
Curved Arrows and Rotation Arrows
Curved arrows are a little different from straight ones, and they trip up almost every beginner at least once. A curved arrow usually means you're rotating, flipping, or turning the paper rather than folding it.
- A curved arrow looping around the model means rotate the whole paper a certain number of degrees before your next fold.
- A curved arrow with a loop at one end means flip the entire model over, like turning a pancake.
- A short curved arrow near a single flap means fold that one section over and tuck it under a nearby layer.
Mixing up a curved arrow for a straight one is one of the most common mistakes I see in beginner folding groups. It usually leads to the model facing the wrong direction a few steps later, which forces a full restart.
Photo Credit: Jahra Tasfia Reza
How to Follow a Multi-Step Origami Diagram
Long diagrams with fifteen or twenty steps can feel overwhelming the first time you see them. Breaking the process down into a simple routine makes it far more manageable.
- Read the whole step before folding anything. Look at both the line type and the arrow together before you touch the paper.
- Check the shape shown in the next step. Diagrams usually show what your paper should look like right after the fold, so you can confirm you did it correctly.
- Fold slowly and check your edges. Corners should line up exactly unless the diagram clearly shows an offset fold.
- Use the small preview thumbnail if one is included. Many books show a tiny zoomed-in image of just the area you're folding, which helps when the full diagram feels cluttered.
- Don't skip ahead. Skipping a fold and unfold step often means missing a crease you'll need three or four steps later.
If a diagram ever feels unclear, it often helps to slow down and review the Basic Origami Folds that most diagrams build from. Nearly every complex model is just a combination of these same basic moves stacked together.
Pro Tips for Reading Diagrams Without Frustration
A few habits make diagram reading noticeably smoother once you start folding regularly.
- Practice with a model you've already folded once. Reading a diagram for something familiar helps you connect the symbols to moves you already know.
- Keep your paper the same size as shown in the diagram. Odd sizes can throw off proportions on more advanced models.
- Work in good lighting. Dashed and dotted lines are easy to confuse in dim rooms, and that one mix-up can throw off several steps later.
- Don't rush through fold and unfold steps. These pre-creases often matter more than they look like they do at the time.
- Circle confusing symbols with a pencil on a printed page. It's a small habit, but it helps you spot patterns across multiple diagrams over time.
As one longtime folder in my local origami group likes to say, the diagram is only confusing until your hands understand what your eyes are seeing.
That line has stuck with me for years, mostly because it's true. Diagram reading is a skill your hands build just as much as your eyes do.
Photo Credit: Internet
Traditional Diagrams vs Video Tutorials
Diagrams aren't the only way to learn a fold, and it helps to know how they compare to video tutorials before picking your learning style.
|
Format |
Best For |
Downside |
|
Printed diagrams |
Working at your own pace, referencing later |
Can feel confusing without symbol knowledge |
|
Video tutorials |
Watching exact hand movements in real time |
Harder to pause mid-fold without losing your place |
|
Diagram apps |
Zooming into tricky steps, portability |
Requires a device nearby while folding |
I still prefer diagrams for most models, mostly because I can flip back a page instantly if I made a mistake. Videos are great for tricky 3D folds, but they're harder to pause at the exact right moment.
Frequently Asked Questions
What do arrows mean in origami diagrams? Arrows show movement, like folding in a direction, folding and unfolding, or tucking paper into a pocket. The arrow shape tells you exactly which action to perform.
What do valley and mountain fold lines mean? A valley fold line means you fold the paper toward you, creating a dip. A mountain fold line means you fold it away from you, creating a raised ridge.
What does a dotted or dashed line mean in an origami diagram? A dotted line usually shows a hidden edge under a layer of paper. A dashed line typically marks where an upcoming fold will happen.
What do curved arrows mean in origami instructions? Curved arrows usually mean rotate or flip the paper, rather than fold it. A loop at the end of the arrow often signals a full flip of the model.
What is the Yoshizawa-Randlett notation system? It's the standard set of lines and arrows used in almost all origami diagrams worldwide. It was developed by Akira Yoshizawa and later formalized by Samuel Randlett, which is why nearly every diagram looks similar no matter where it comes from.
How do you follow a multi-step origami diagram? Read each step fully before folding, check the shape shown for the next step, and fold slowly enough to confirm your edges line up correctly before moving on.
Final Thoughts
Diagrams feel like a foreign language right up until the moment they don't. Once a handful of symbols click, an entire library of origami models opens up in front of you.
If you're ready to put these symbols into practice on a real model, read the full origami guide for a complete walkthrough of where to go next.





Leave a Reply