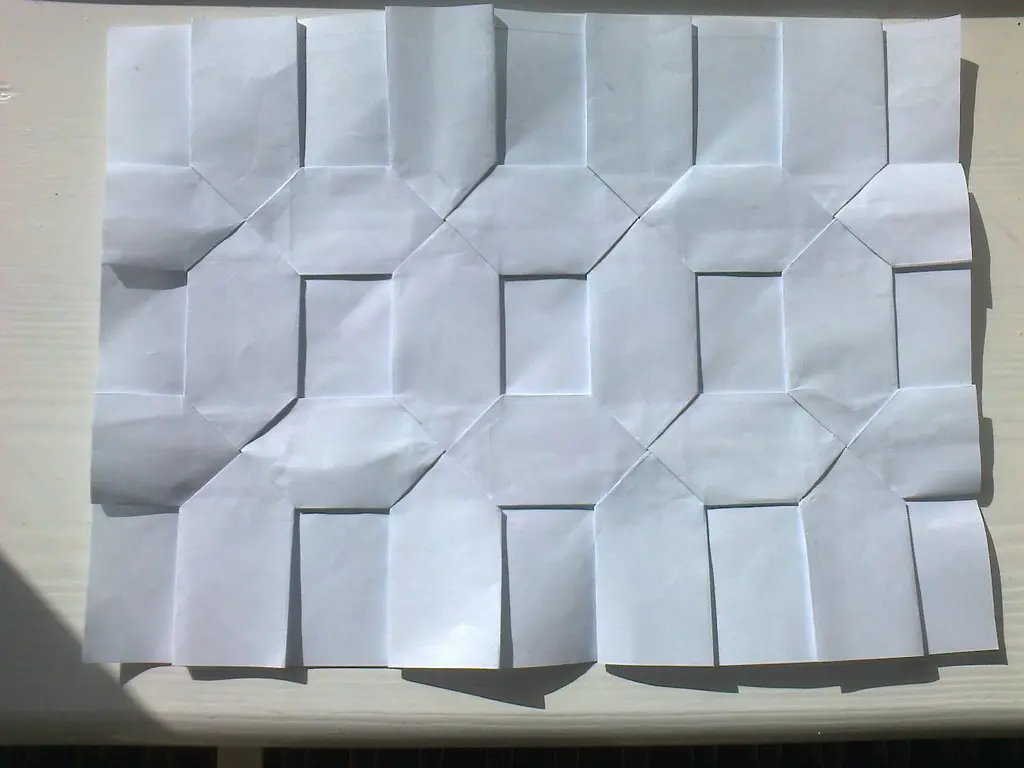
I once spent nearly an hour folding a twist fold tessellation only to watch the entire pattern drift diagonally across the paper, all because my starting grid was off by a few millimeters near one edge. Tessellation grid pre-creasing is the step that prevents exactly that kind of slow, frustrating drift, and this guide walks through how to build an even, reliable grid before any actual tessellation folding begins.
This tutorial is Part of Tessellation Origami: How It Works, and it covers why pre-creasing matters so much, how to fold an even grid, which grid sizes work best for different patterns, and how to keep every crease intersection lined up from corner to corner.
Why Is Pre-Creasing Important for Origami Tessellations?
Pre-creasing means folding a full grid of evenly spaced lines into your paper before you begin shaping any actual tessellation pattern. This grid acts as a map, giving every twist fold, pleat, or molecule a consistent set of guidelines to follow instead of forcing you to judge each fold's position freehand.
I've found that skipping this step is the single most common reason a tessellation attempt falls apart partway through. Without a solid pre-creased grid, tiny inconsistencies in fold spacing compound as you work outward, and what starts as a barely noticeable gap near the center can turn into a visibly crooked pattern by the time you reach the edges.

Photo Credit: Hobby Guidebook Editorial
Pre-creasing tessellation grid work takes patience, but it's genuinely the foundation everything else depends on. A tessellation is only as accurate as the grid it was built on top of.
Materials Needed for Tessellation Grid Pre-Creasing
A few specific tools make building an accurate grid considerably easier, especially once you move beyond very small practice pieces.
|
Item |
Purpose |
|
Square paper, medium weight (kami or thicker) |
Holds sharp creases through repeated folding without tearing |
|
Ruler with metric markings |
Measures consistent grid spacing across the sheet |
|
Bone folder |
Creates crisp, accurate creases along every grid line |
|
Pencil (light touch) |
Marks reference points for grid divisions before folding |
|
Cutting mat or flat firm surface |
Provides a stable base for measuring and folding accurately |
How Do You Make an Even Tessellation Grid?
Building an even grid comes down to a consistent folding sequence, repeated carefully across the entire sheet.
- Start with a perfectly square sheet, checking all four corners with a ruler to confirm true right angles before folding anything.
- Fold the paper in half, then in half again, unfolding after each fold to create your first set of quarter divisions across the sheet.
- Continue halving each section evenly, folding each quarter in half again to reach eighths, and repeating until you reach your target grid size, such as 16ths or 32nds.
- Rotate the paper 90 degrees and repeat the entire halving sequence, creating a second set of creases that cross the first set at even intervals.
- Check for a clean crosshatch pattern once both directions are complete, confirming that horizontal and vertical lines intersect at consistent points across the whole sheet.
- Reinforce every crease with a bone folder, running it firmly along each line so the grid holds its shape clearly through the tessellation folding that follows.
Getting comfortable with this grid sequence really pays off once you move into an actual pattern. Twist Fold Tessellation Technique builds directly on top of a pre-creased grid like this one, using the intersections you've just created as anchor points for each twist.
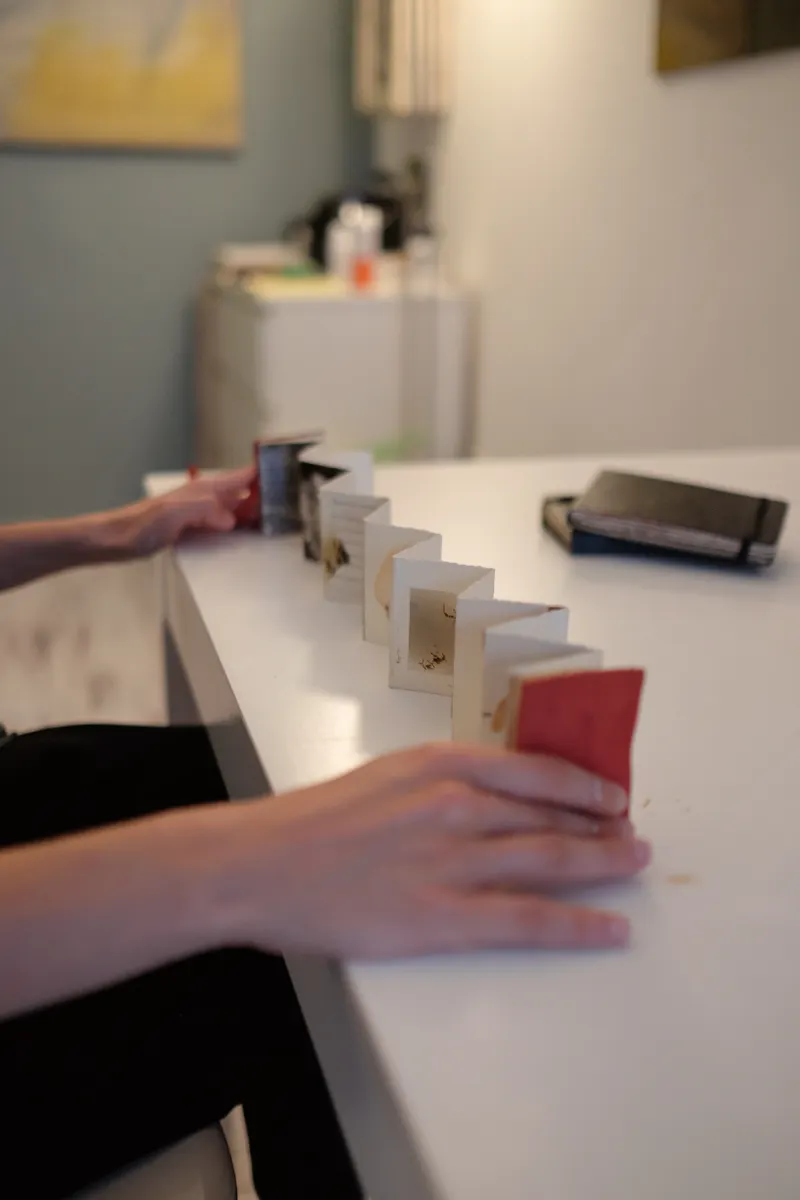
Photo Credit: Eyup Beyhan
What Grid Sizes Are Useful for Tessellations?
Grid size depends heavily on the complexity of the pattern you're planning and how much paper you're working with overall. Smaller grids, like 8×8 or 16×16 divisions, work well for beginner tessellations and larger sheets, since fewer intersections mean less room for small errors to accumulate.
Larger grids, such as 32×32 or 64×64, allow for much finer, more detailed tessellation patterns, but they demand significantly more precision during pre-creasing, since even a tiny misalignment gets multiplied across dozens of intersecting lines. Tessellation base grid folding at this scale often benefits from working on larger paper, simply because tighter grid spacing becomes harder to fold accurately on smaller sheets.
A reasonable starting point for most beginners is a 16×16 grid on a sheet around 20 to 25 centimeters square, which offers enough intersections for interesting patterns without becoming overwhelming to pre-crease accurately by hand.
How Do You Keep Crease Intersections Aligned?
Alignment problems tend to creep in gradually rather than all at once, which is exactly why they're so easy to miss until a pattern is well underway.
- Fold from the center outward whenever possible. Starting divisions at the middle of the sheet and working toward the edges tends to distribute small errors more evenly than folding from one edge across.
- Check alignment every few folds, not just at the end. Catching a slightly off crease early is far easier than trying to fix a pattern several folds later.
- Use consistent pressure with your bone folder. Uneven pressure across a crease can cause the paper to shift slightly, throwing off the next fold's starting position.
- Work on a completely flat surface. Folding on an uneven or soft surface makes it much harder to judge whether opposite edges are lining up correctly.
- Recheck square corners periodically. If your paper starts to feel slightly off-square partway through, it's worth stopping to confirm before continuing the grid sequence.
Reviewing foundational fold types also helps quite a bit here, since precise, controlled folding underlies every step of this process. Origami Techniques Explained covers the core folds that make consistent, accurate pre-creasing feel far more intuitive once you're managing dozens of grid lines at once.
What Paper Is Easiest to Pre-Crease for Tessellations?
Paper choice affects grid accuracy more than folders often expect starting out. Medium-weight kami paper tends to be the easiest starting point, since it creases sharply without requiring excessive pressure, and it's forgiving enough to handle the repeated folding a full grid demands.
Very thin paper often struggles to hold sharp creases through dozens of folds, sometimes softening at intersection points before the grid is even finished. Thicker specialty papers, while excellent for final tessellation work, can be genuinely difficult to pre-crease accurately by hand, since the added stiffness resists the tight, repeated folds a fine grid requires.
A tessellation folder I once spoke with at a paper arts gathering described the grid stage as laying railroad tracks before the train ever runs, since every twist and pleat that comes later depends entirely on tracks that were set down straight and even from the very beginning. That description has stuck with me, since rushing through grid folding on thicker paper early on taught me exactly how much a shaky foundation shows up in the finished pattern.
Common Mistakes When Pre-Creasing a Tessellation Grid
A handful of habits consistently throw off grid accuracy for folders working through this stage for the first time.
- Starting with a sheet that isn't perfectly square. Even a slightly uneven starting square compounds into visibly crooked lines by the time the full grid is complete.
- Folding too quickly through the halving sequence. Rushing early divisions often leaves tiny gaps that grow more noticeable with each additional halving.
- Pressing creases unevenly. A crease that's sharp on one end and faint on the other can shift slightly during later folds, throwing off intersection alignment.
- Skipping the crosshatch check. Moving straight into tessellation folding without confirming a clean, even grid usually means discovering the problem much later, when it's far harder to fix.

Photo Credit: DS stories
Comparing Small and Large Tessellation Grids
|
Factor |
Small Grid (8×8 to 16×16) |
Large Grid (32×32 and up) |
|
Precision required |
Moderate |
High |
|
Best for |
Beginners, simpler patterns |
Detailed, intricate patterns |
|
Paper size needed |
Smaller sheets work fine |
Larger sheets recommended |
|
Error tolerance |
More forgiving |
Errors compound quickly |
Frequently Asked Questions
Why is pre-creasing important for origami tessellations? Pre-creasing builds an even reference grid that guides every later fold, preventing small spacing errors from compounding into a crooked finished pattern.
How do you make an even tessellation grid? Repeatedly halve a perfectly square sheet in both directions, checking for a clean crosshatch pattern, then reinforce every crease firmly with a bone folder.
What grid sizes are useful for tessellations? Smaller grids like 8×8 or 16×16 suit beginners and simpler patterns, while larger grids like 32×32 allow for finer detail but demand much greater precision.
How do you keep crease intersections aligned? Fold from the center outward, check alignment frequently, use consistent bone folder pressure, and work on a completely flat surface throughout the process.
What paper is easiest to pre-crease for tessellations? Medium-weight kami paper creases sharply without excessive pressure and handles repeated folding well, making it the most forgiving choice for building a grid.
Final Thoughts
A pre-creased grid might feel like a slow, unglamorous first step, but it's genuinely the difference between a tessellation that locks together cleanly and one that drifts crooked halfway through. Take the extra time to fold that grid evenly, check it before moving on, and the pattern work that follows becomes noticeably smoother.
If you're ready to explore the rest of what this hobby has to offer, Read the full origami guide for everything from paper choices to techniques across every skill level.





Leave a Reply