A tiny rip appeared three folds from the finish line on a crane I was folding for a friend's birthday, right along a crease I'd pressed too hard on the first time. Here's exactly how to fix torn origami paper, when it's worth saving the model, and when starting fresh is honestly the faster path.
This piece is Part of Common Origami Questions & Comparisons, and it covers what to do the moment a tear happens, which repairs actually hold up, and how to avoid tearing paper again on your next model.
Can Torn Origami Paper Be Repaired?
Yes, in most cases, though how well the repair holds depends heavily on where the tear happened and how far into the model you are. Small tears along a single crease line are usually the easiest to fix, since the surrounding folds still hold the paper's overall shape steady.
I've found that tears near the center of a model, where multiple layers overlap, are actually more forgiving than tears along an outer edge. Layered paper hides small imperfections better, while an edge tear stays visible no matter how carefully you patch it.
When Can You Continue Folding After a Paper Tear?
This really comes down to how deep the tear runs and whether the affected area still needs more folding ahead. A short tear along an existing crease, in a spot you've already finished folding, usually won't affect anything else in the model.
A tear that crosses a fold line you haven't made yet is riskier, since the weakened paper may tear further once you press a new crease through it. If the tear sits right where your next fold needs to happen, it's often better to pause and repair it first rather than risk it spreading.
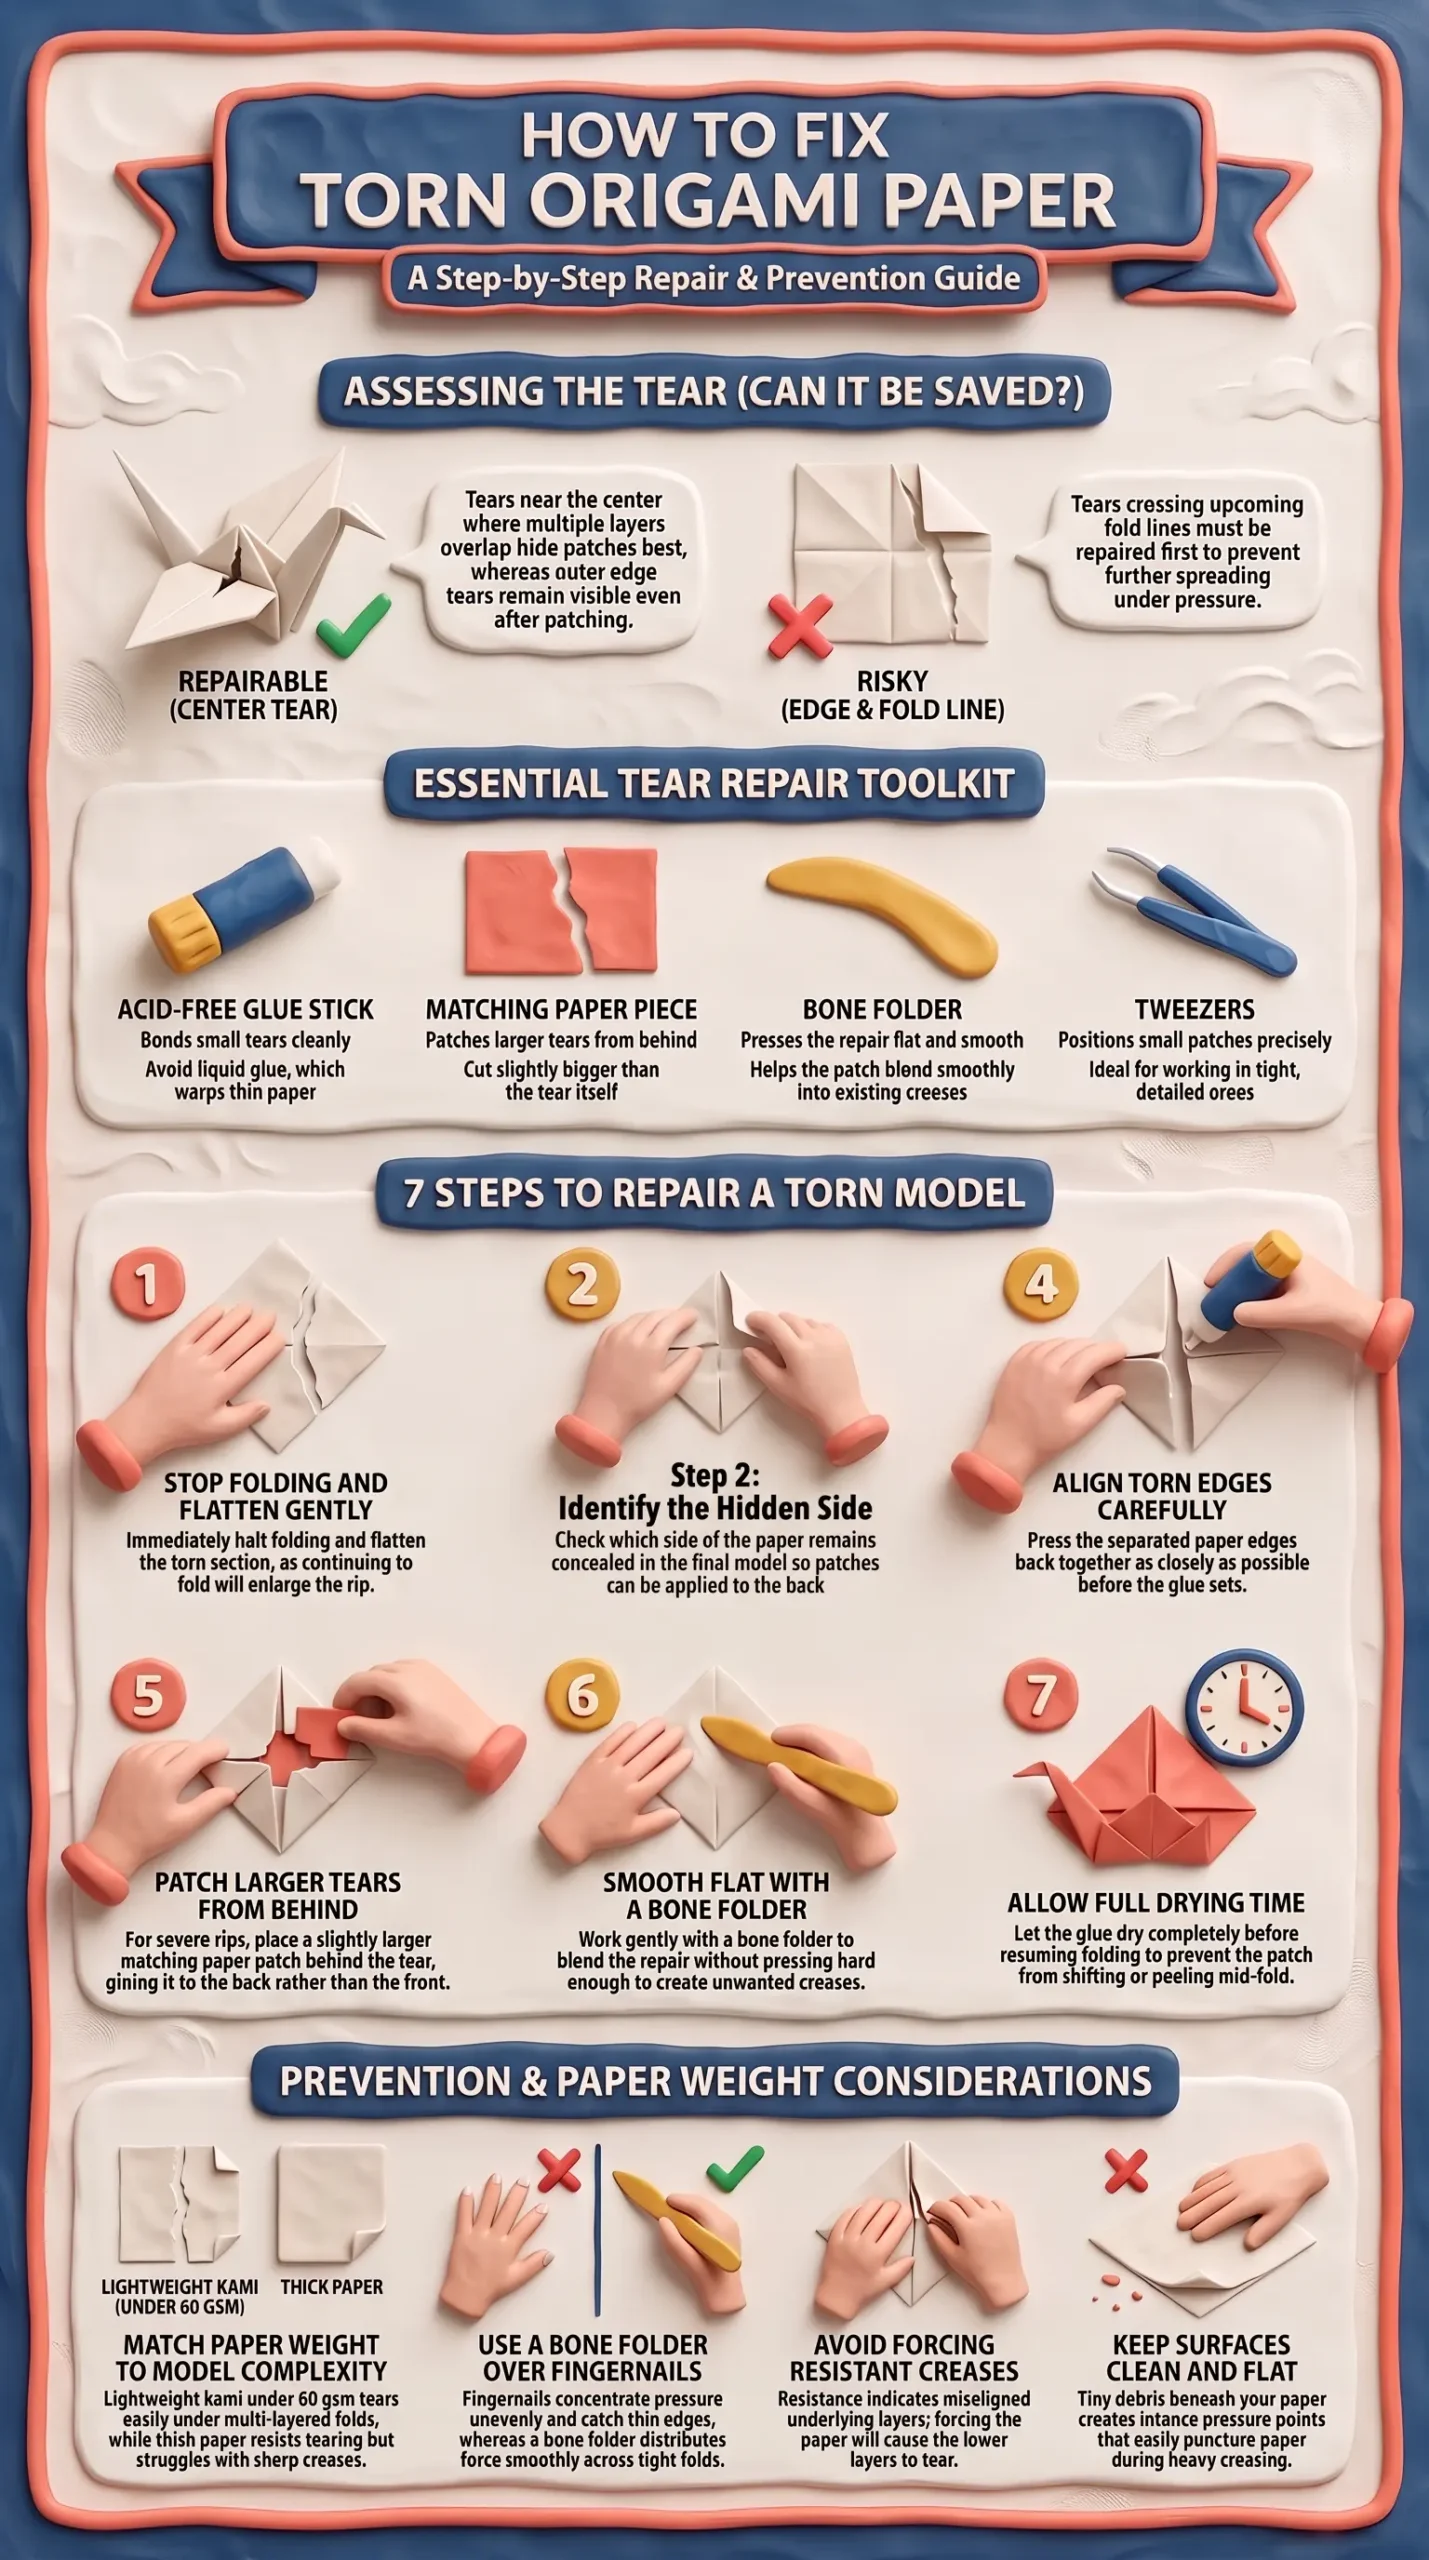
Photo Credit: Hobby Guidebook Editorial
Materials for Fixing Torn Origami Paper
A few simple items handle most origami paper tear repair situations without needing anything specialized.
|
Item |
Purpose |
Notes |
|
Acid-free glue stick |
Bonds small tears cleanly |
Avoid liquid glue, which warps thin paper |
|
Small piece of matching paper |
Patches larger tears from behind |
Cut slightly bigger than the tear itself |
|
Bone folder |
Presses the repair flat and smooth |
Helps the patch blend into existing creases |
|
Tweezers |
Positions small patches precisely |
Useful for tight, detailed areas |
Step-by-Step: Repairing a Torn Model
Follow these steps as soon as you notice the tear, rather than continuing to fold and hoping it won't matter.
- Stop folding and flatten the torn area gently. Pressing forward without addressing the tear usually makes it worse.
- Check which side of the paper shows in the final model, since you'll want your patch on the hidden or back side whenever possible.
- Apply a thin layer of glue stick along the tear's edges, avoiding excess glue that could seep through and stain the visible surface.
- Press the torn edges back together carefully, aligning them as closely as possible before the glue sets.
- For larger tears, place a small matching paper patch behind the tear, gluing it flat against the back side rather than over the visible front.
- Smooth everything with a bone folder, working gently rather than pressing hard enough to create a new unwanted crease.
- Let the repair dry fully before continuing to fold. Rushing this step often causes the patch to shift or peel loose mid-fold.
A paper crafting teacher I once took a workshop with described tear repair as buying the model a second chance, not guaranteeing it'll look perfect. That stuck with me, since it's honestly the right expectation. A repaired tear rarely disappears completely, but it usually holds well enough to finish the piece.
Can Glue Be Used to Repair a Torn Origami Model?
Yes, glue is genuinely the most reliable fix for a torn model, as long as you use it sparingly and choose the right type. A thin acid-free glue stick works far better than liquid craft glue, which tends to soak into thin paper and cause visible warping or discoloration once dry.
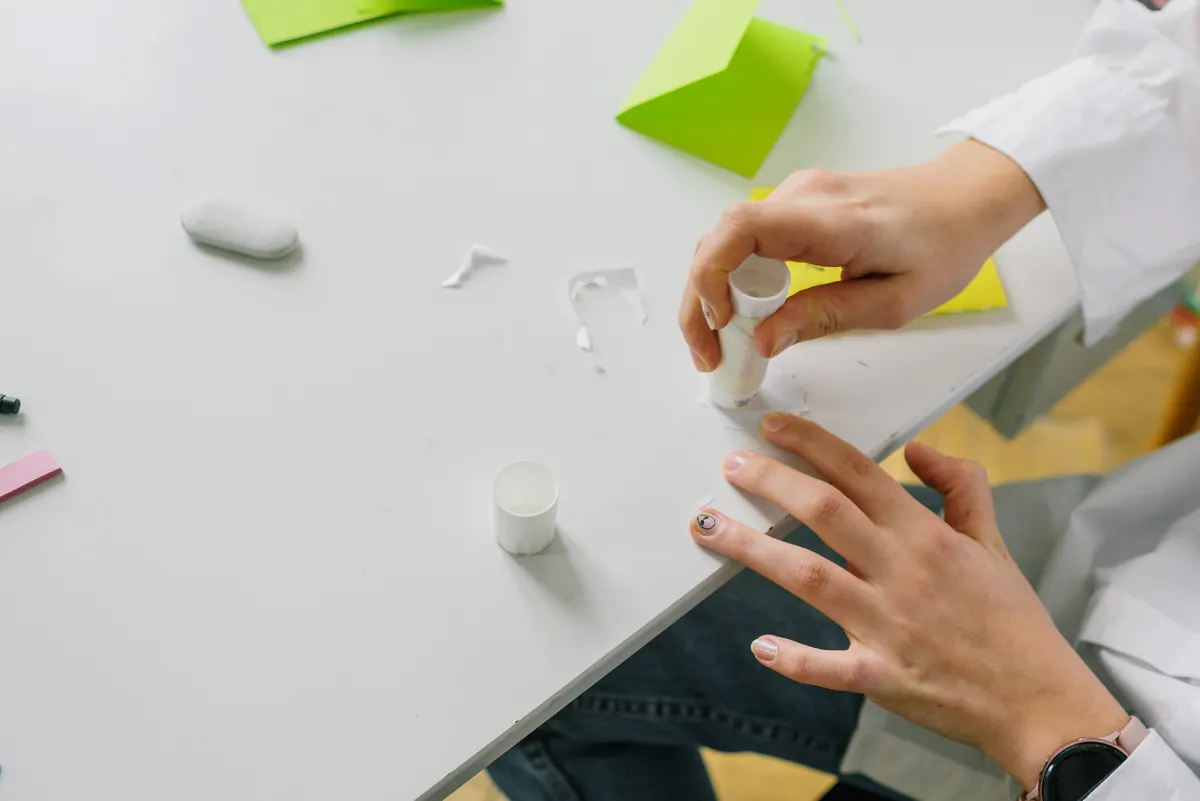
Photo Credit: Ksenia Chernaya
Apply glue only to the torn area itself, never across a wider section, since extra glue stiffens paper and makes it harder to complete any remaining folds cleanly. Once dried, a well-glued tear usually holds through the rest of the folding process without further issues.
How Can You Prevent Origami Paper From Tearing?
Prevention really comes down to a few consistent habits rather than any single trick. Working slowly on tight, multi-layer folds gives you more control than rushing through a sequence you haven't fully checked against the diagram first.
- Avoid forcing a fold that resists. If paper won't crease smoothly, something earlier in the sequence is likely misaligned, and forcing it through usually tears the layer underneath.
- Keep your folding surface clean and flat. Small debris under the paper creates pressure points that tear easily during sharp creases.
- Use a bone folder instead of a fingernail on tight, layered folds, since fingernails concentrate pressure unevenly and catch on thin paper edges.
- Check paper quality before starting a complex model. Older or previously folded paper tears more easily than a fresh sheet.
Does Paper Thickness Affect Tearing?
Yes, quite a bit. Thinner paper, especially lightweight kami under 60 gsm, tears more easily under repeated folding, particularly on models with many overlapping layers near the same point. Thicker paper resists tearing better but brings its own problem, struggling to hold sharp creases once too many layers stack up.
If you're unsure which weight suits your project, Origami Paper breaks down the different weights and finishes available, which helps a lot when choosing paper for tear-prone models with heavy layering. And if thick paper is fighting you for a different reason entirely, refusing to crease rather than tearing, Why Is My Origami Paper Too Thick to Fold? covers that specific problem in more depth.
Photo Credit: Saeed Khokhar
Pro Tips for Handling Tears Calmly
- Pause before reacting. Most tears look worse in the moment than they actually are once flattened and assessed calmly.
- Keep a small paper scrap pack nearby for patching, matched roughly to whatever colors you fold with most often.
- Practice tricky sequences on scrap paper first, especially reverse folds, so tears happen on paper you weren't planning to keep anyway.
Frequently Asked Questions
Can torn origami paper be repaired? Yes, small tears along existing creases are usually easy to fix with a thin layer of acid-free glue and careful pressing.
When can you continue folding after a paper tear? You can usually continue if the tear sits in an area you've already finished folding, but pause and repair first if it crosses an upcoming fold line.
How can you prevent origami paper from tearing? Fold slowly, avoid forcing resistant creases, use a bone folder instead of a fingernail, and check your paper's quality before starting.
Does paper thickness affect tearing? Yes, thinner paper tears more easily under repeated layered folding, while thicker paper resists tearing but struggles with sharp creases.
Can glue be used to repair a torn origami model? Yes, a thin acid-free glue stick applied sparingly to the tear works best, since liquid glue tends to warp thin paper.
Final Thoughts
A torn sheet doesn't have to mean starting over. Pause, assess where the tear sits, and a careful patch with the right glue usually gets your model to the finish line. If you're ready to explore the rest of what this hobby has to offer, Read the full origami guide for everything from paper choices to techniques across every skill level.





Leave a Reply