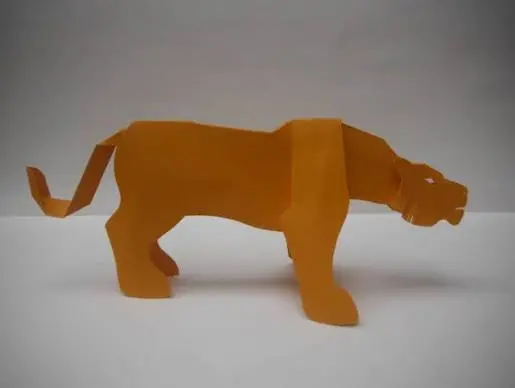
I still remember holding my first layered kirigami piece up to a window, watching light pass through three separate sheets stacked with just enough offset to create actual depth, and realizing paper could do something I'd never expected from a flat material. The layered kirigami technique is exactly that, stacking multiple cut sheets to build dimension and shadow into a design that a single layer simply can't achieve on its own.
This tutorial is Part of Kirigami: Origami with Cutting, and it covers what layered kirigami actually is, how depth gets built through stacked layers, which paper handles multiple cuts well, and how to keep everything aligned from the first layer to the last.
What Is Layered Kirigami?
Layered kirigami is a paper craft technique that combines cutting and folding across multiple sheets stacked together, rather than working from a single piece of paper. Each layer is cut with its own pattern, then the sheets are stacked with small gaps or offsets between them, creating a three-dimensional effect when viewed straight on or held up to light.
I've found that people often confuse this with standard kirigami, which typically involves cutting and folding just one sheet into a flat design. Multi-layer kirigami takes that same cutting foundation and adds genuine depth, since each additional sheet contributes its own shape to the final layered image.
This technique sits a bit further along the skill path than basic single-sheet cutting, mostly because working with several sheets at once introduces alignment challenges that a single layer never presents.
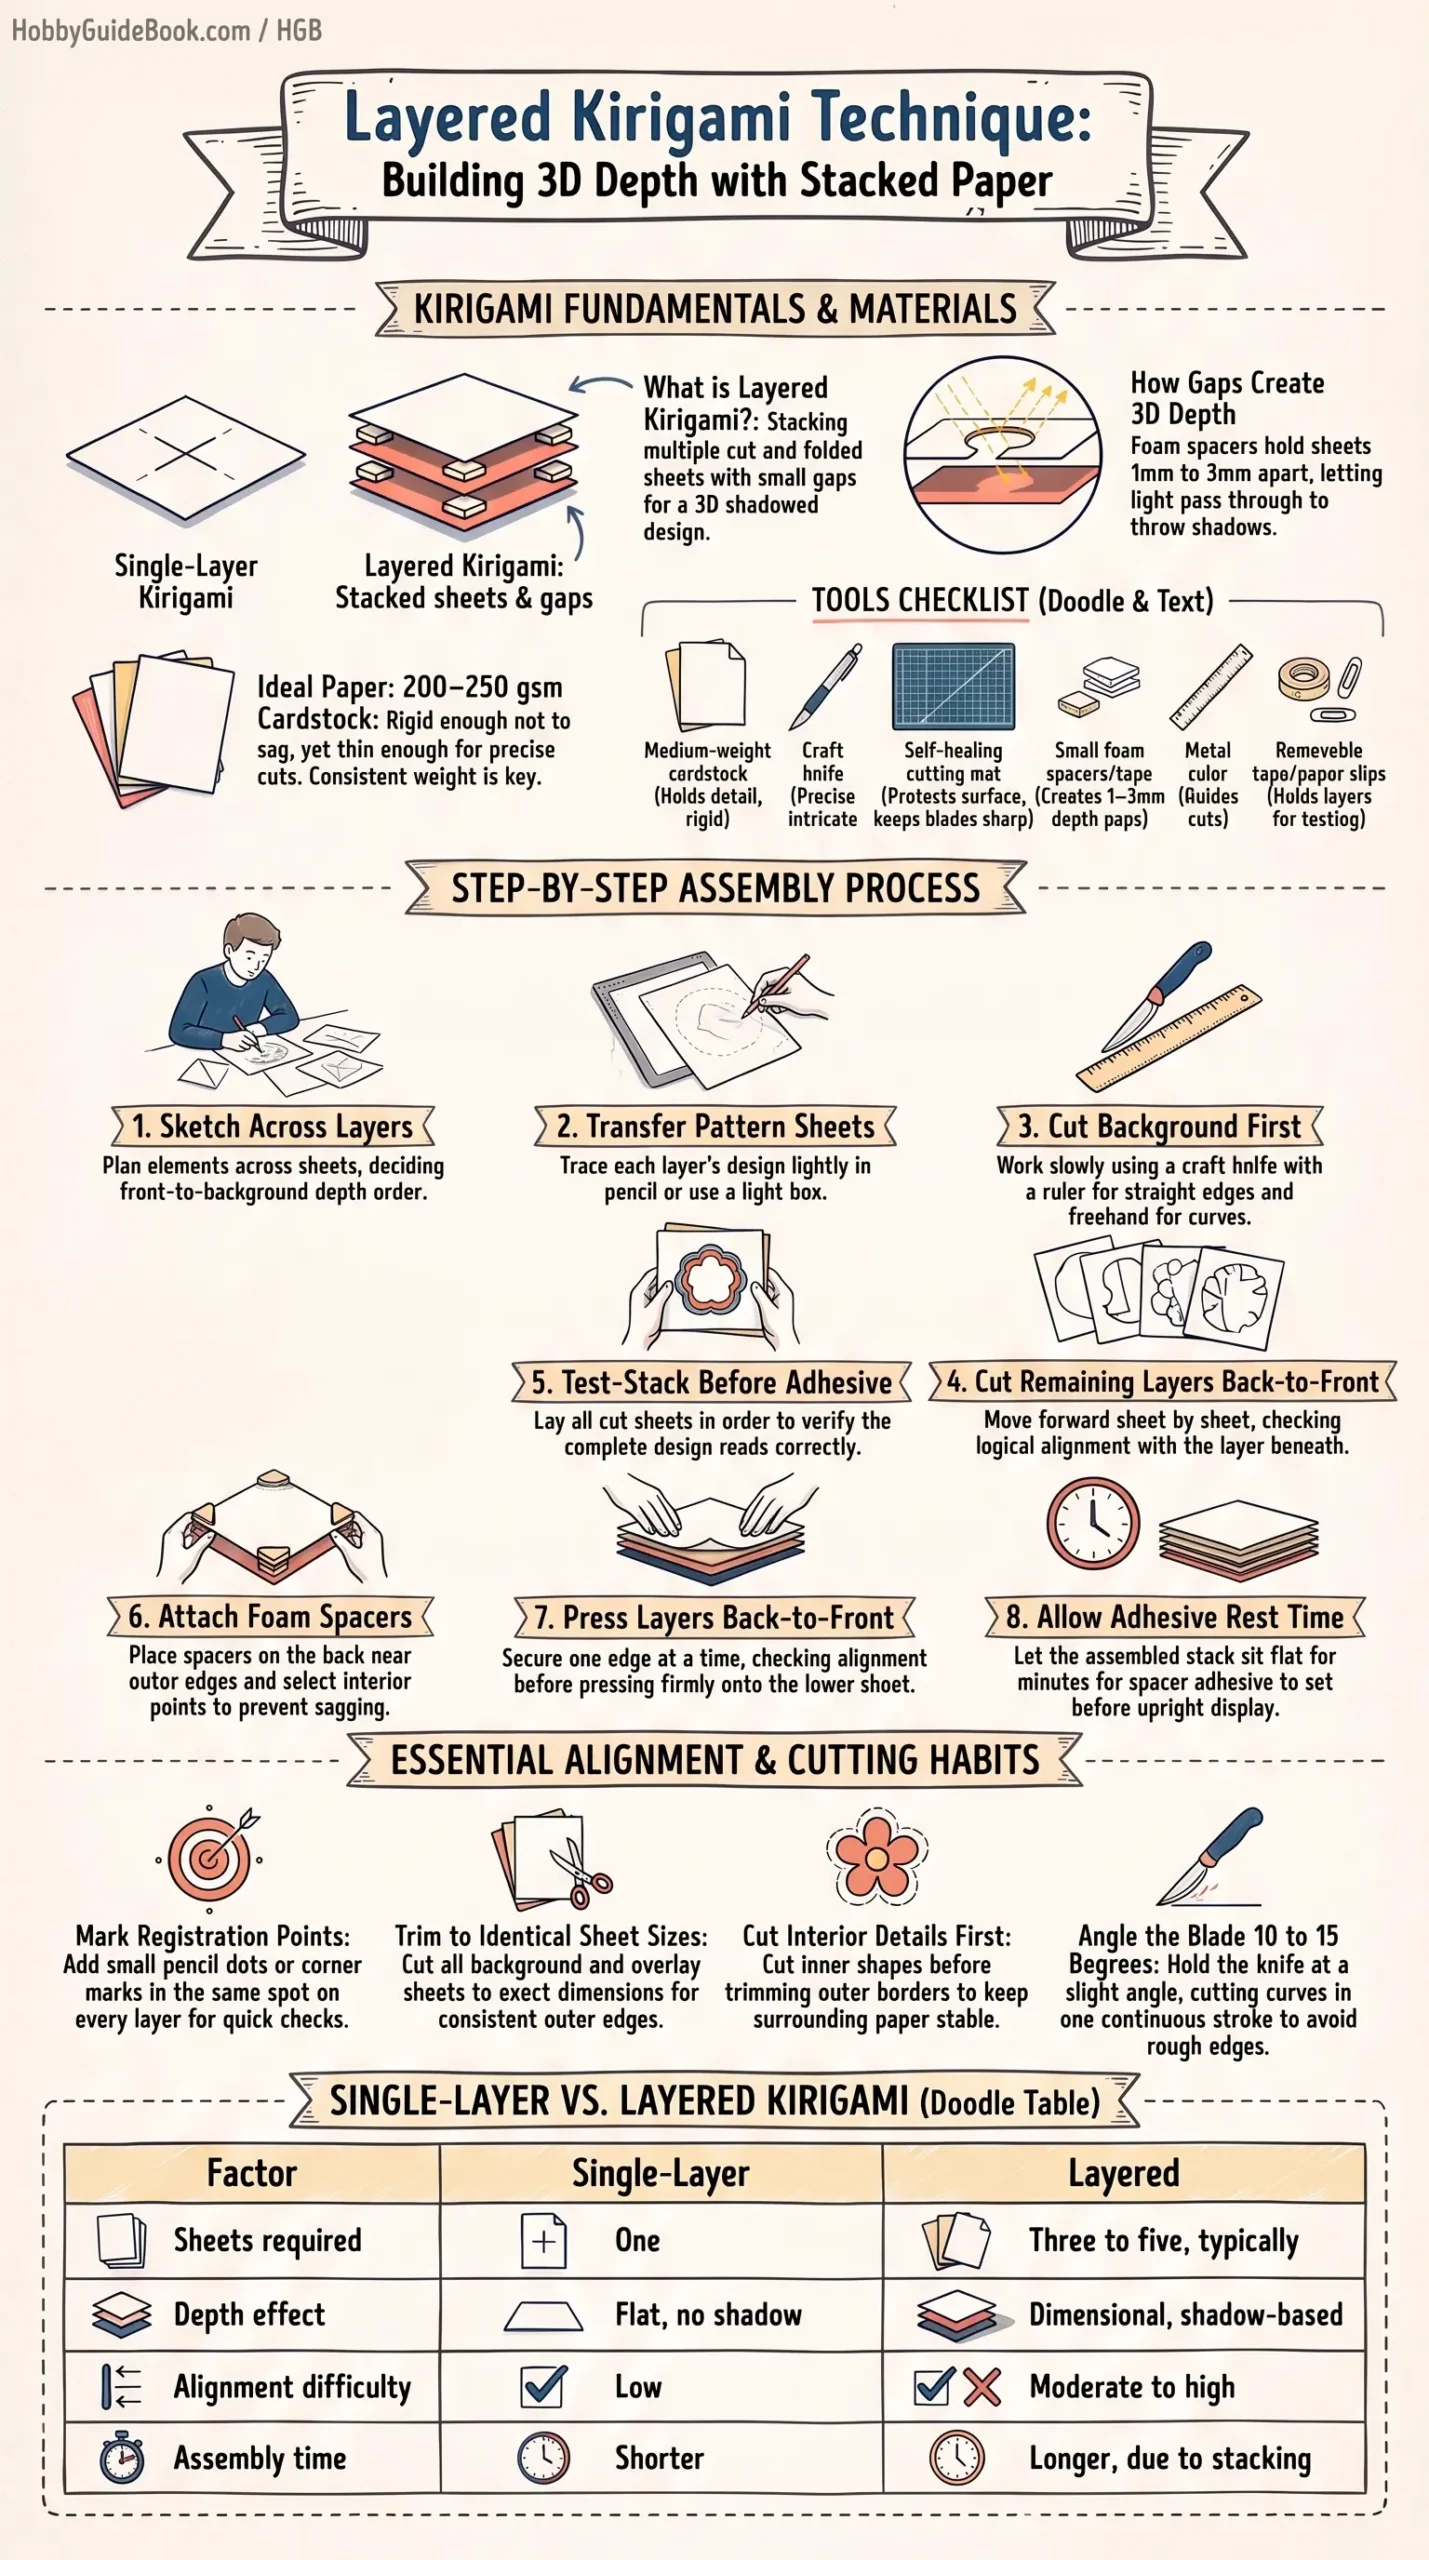
Photo Credit: Hobby Guidebook Editorial
Materials Needed for Layered Kirigami
A specific set of supplies makes a noticeable difference once you're working with multiple stacked sheets rather than just one.
|
Item |
Purpose |
|
Medium-weight cardstock (three to five sheets per design) |
Holds cut detail cleanly while staying rigid enough to stack without sagging |
|
Craft knife with sharp blades |
Creates clean, precise cuts across intricate layered patterns |
|
Self-healing cutting mat |
Protects your work surface and keeps blade edges sharp longer |
|
Small foam spacers or foam tape |
Creates the gap between layers that produces the depth effect |
|
Metal ruler |
Guides straight cuts and keeps blade lines accurate across each layer |
|
Removable tape or small paper clips |
Temporarily holds layers in position while checking alignment before final assembly |
How Do Layers Create Depth in Kirigami?
Depth in layered kirigami comes from a fairly simple principle, small physical gaps between stacked sheets cast shadows and create visual separation that a flat single sheet can't produce. Each layer is cut with a slightly different portion of the overall design, so when stacked, some areas show through open space while others sit directly behind cut sections of the layer above.
Foam spacers or small strips of foam tape are usually placed between layers to hold that gap consistently, often somewhere between one and three millimeters depending on how pronounced you want the shadow effect to be. A wider gap creates more dramatic depth and stronger shadows, while a tighter gap gives a subtler, more blended look between layers.
This is really the heart of layered paper cut origami work, since the actual cutting technique for each individual sheet isn't drastically different from standard kirigami. The depth entirely comes from how those separately cut sheets get spaced and combined afterward.
If dimensional paper work interests you beyond stacking, there's a related cutting-based technique worth knowing about early on. Kirigami Pop-Up Card Technique covers how cuts and folds combine on a single sheet to create pieces that pop upward rather than building depth through separate stacked layers, which makes a useful comparison as you're deciding which approach fits a given project.
How to Build a Layered Kirigami Design Step by Step
This process moves through planning, cutting, and assembly, and skipping ahead between these stages is usually where alignment problems start.
- Sketch your design across separate layers first, deciding which elements belong on which sheet based on how far back or forward they should appear in the final piece.
- Transfer each layer's pattern onto its own sheet of cardstock, either by tracing lightly in pencil or using a light box if your paper is thick enough to make tracing difficult.
- Cut the background layer first, working slowly with your craft knife along a metal ruler for straight lines and freehand for curved details.
- Cut each subsequent layer, working from back to front, checking that each pattern lines up logically with the layer beneath it as you go.
- Lay all layers out in order before attaching anything, confirming the overall design reads correctly as a stack before committing to permanent placement.
- Attach small foam spacers to the back of each layer, positioning them near the edges and in a few interior points so the sheet stays flat rather than sagging in the middle.
- Press each layer onto the one beneath it, working from the back layer forward, checking alignment carefully before pressing firmly enough for the spacers to hold.
- Let the assembled piece rest flat for a few minutes after final assembly, giving spacer adhesive time to set fully before handling the piece upright.

Photo Credit: YIMING TANG
A quick safety note fits naturally here, since craft knives are doing a lot of the work in this technique. Always cut on a self-healing mat, keep fingers well clear of the blade path, and swap in a fresh blade as soon as cutting starts to feel like it's dragging rather than slicing cleanly, since a dull blade is actually more likely to slip than a sharp one.
What Paper Works Best for Layered Kirigami?
Paper choice matters more here than in single-layer projects, since every sheet needs to hold its shape independently while also stacking cleanly against its neighbors. Medium-weight cardstock, generally in the 200 to 250 gsm range, tends to work best, offering enough rigidity to stay flat once spacers are attached without becoming too thick to cut cleanly.
Paper that's too thin often warps once spacers are added, curling slightly at the edges and throwing off the alignment between layers. Paper that's too thick makes fine detail cutting considerably harder, especially for intricate patterns that require the blade to turn tight corners.
Consistent paper weight across all layers in a single project also matters quite a bit. Mixing a thin layer with a thick one creates uneven spacing once stacked, which can make the depth effect look lopsided rather than smooth.
How Do You Keep Multiple Layers Aligned?
Alignment is probably the single biggest challenge in layered kirigami, and a few consistent habits make a real difference here.
- Use registration marks on every layer. Small pencil dots or light corner marks in the same position on each sheet make lining up layers during assembly much faster and more accurate.
- Cut all layers from the same size sheet. Trimming sheets to identical dimensions before cutting keeps edges consistent, which makes stacking far more predictable.
- Test-stack before attaching spacers. Laying layers loosely on top of each other first lets you catch alignment problems while they're still easy to fix.
- Work on a flat surface throughout assembly. Even slight surface unevenness can throw off how layers settle against each other once spacers are attached.
- Secure one edge at a time during final assembly. Attaching an entire layer at once makes small corrections nearly impossible, while working edge by edge leaves room to adjust as you go.
Building this kind of layered comfort really does connect back to core cutting and folding fundamentals, so it's worth reinforcing those basics as you go. Origami Techniques Explained covers foundational methods that make precise, controlled cutting feel far more familiar once you're managing several stacked sheets at once.
A paper artist I once spoke with at a craft fair described layered kirigami alignment as building a puzzle where every piece is invisible until it's finally lit correctly, since a design that looks scattered flat on the table often reveals its full shape only once light passes through the stacked layers. That description matched my own experience closely, since my early layered pieces always looked more chaotic laid flat than they ever did once properly assembled and held up to a window.

Photo Credit: Internet
What Cutting Techniques Help Create Clean Layered Designs?
A few specific cutting habits noticeably improve the clean, finished look of a layered piece.
- Cut curves in one smooth motion rather than several short strokes. Multiple overlapping cuts along the same curve tend to leave small rough edges that show once layers are stacked.
- Always cut away from your guiding hand. This keeps fingers clear of the blade path and reduces the risk of an accidental slip, especially during longer cutting sessions.
- Cut interior details before outer edges. Working inward-out keeps the paper more stable while making detailed cuts, since the surrounding material hasn't been removed yet.
- Angle the blade slightly rather than holding it perfectly vertical. A slight angle, around 10 to 15 degrees, often produces smoother curved cuts than cutting straight down.
Comparing Single-Layer and Layered Kirigami
|
Factor |
Single-Layer Kirigami |
Layered Kirigami |
|
Sheets required |
One |
Three to five, typically |
|
Depth effect |
Flat, no shadow |
Dimensional, shadow-based |
|
Alignment difficulty |
Low |
Moderate to high |
|
Assembly time |
Shorter |
Longer, due to stacking |
Frequently Asked Questions
What is layered kirigami? Layered kirigami stacks multiple separately cut sheets with small gaps between them, creating a three-dimensional, shadowed effect that a single flat sheet can't achieve.
How do layers create depth in kirigami? Small foam spacers hold sheets apart at a consistent gap, and light passing between the layers creates shadows and visual separation that build dimension.
What paper works best for layered kirigami? Medium-weight cardstock around 200 to 250 gsm works well, staying rigid enough to hold shape while remaining thin enough for detailed cutting.
How do you keep multiple layers aligned? Registration marks, identical sheet sizes, and test-stacking before final assembly all help keep layers lined up accurately throughout the process.
What cutting techniques help create clean layered designs? Cutting curves in smooth single strokes, working interior details before outer edges, and angling the blade slightly all contribute to cleaner finished cuts.
Final Thoughts
Layered kirigami turns a familiar cutting technique into something with genuine physical depth, and the extra planning it takes really does pay off once light hits the finished piece. Start with a simple three-layer design, focus on clean registration marks, and that satisfying shadowed effect will come together more smoothly than it might seem at first.
If you're ready to explore the rest of what this hobby has to offer, Read the full origami guide for everything from paper choices to techniques across every skill level.






Leave a Reply