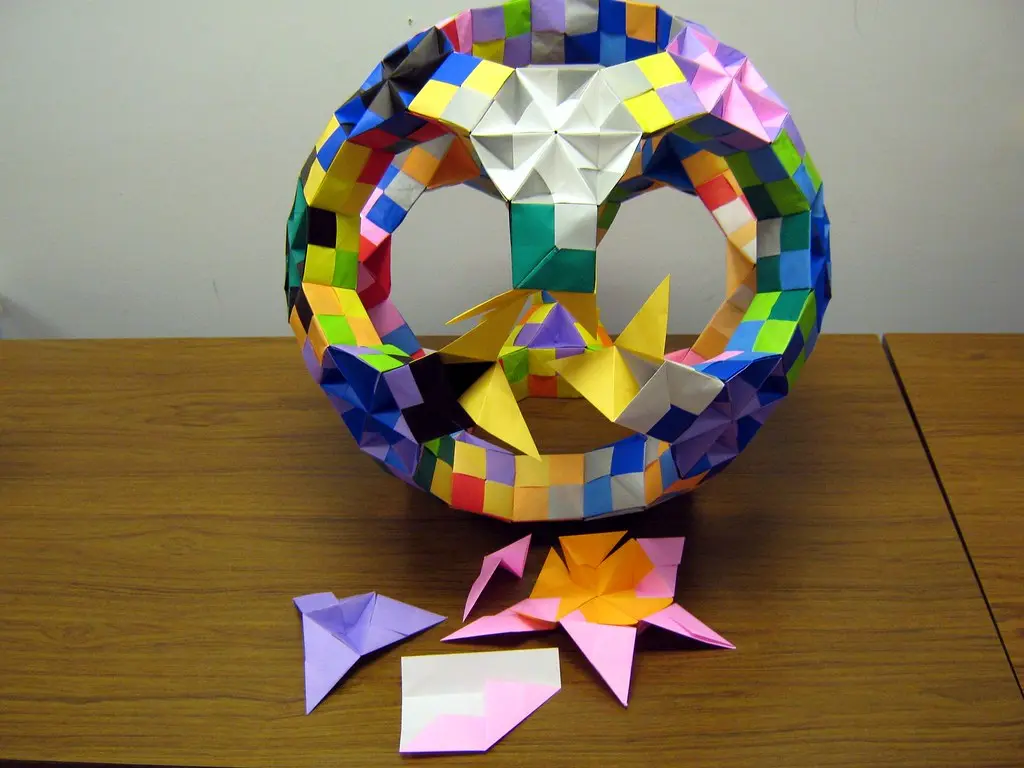
I still remember the first time I locked three Sonobe units together and watched a flat pile of folded paper suddenly pop into a solid three-dimensional corner, no glue, no tape, just paper holding paper in place. That small moment is what hooked me on sonobe unit origami, and this tutorial walks through exactly how to fold and assemble these units yourself, from a single piece all the way to a finished modular shape.
This tutorial is Part of Modular Origami: How It Works, and it covers folding a single Sonobe unit, locking multiple units together, how many pieces common shapes require, and which paper works best for clean, sturdy results.
What Is a Sonobe Unit?
A Sonobe unit is a simple folded paper module, usually made from a single rectangle, that locks together with other identical units to build larger three-dimensional shapes. Each unit has two small pockets and two tabs, and those tabs slide into neighboring units' pockets to create a connection strong enough to hold without any adhesive.
I've found that beginners are often surprised by how basic the individual unit fold actually is. The real skill in sonobe module folding isn't the folding itself, it's understanding how the units interlock, since that's where most early confusion tends to happen.
Sonobe units are the foundation for a huge range of modular origami, from simple three-unit pyramids to elaborate spheres built from dozens of interlocking pieces.
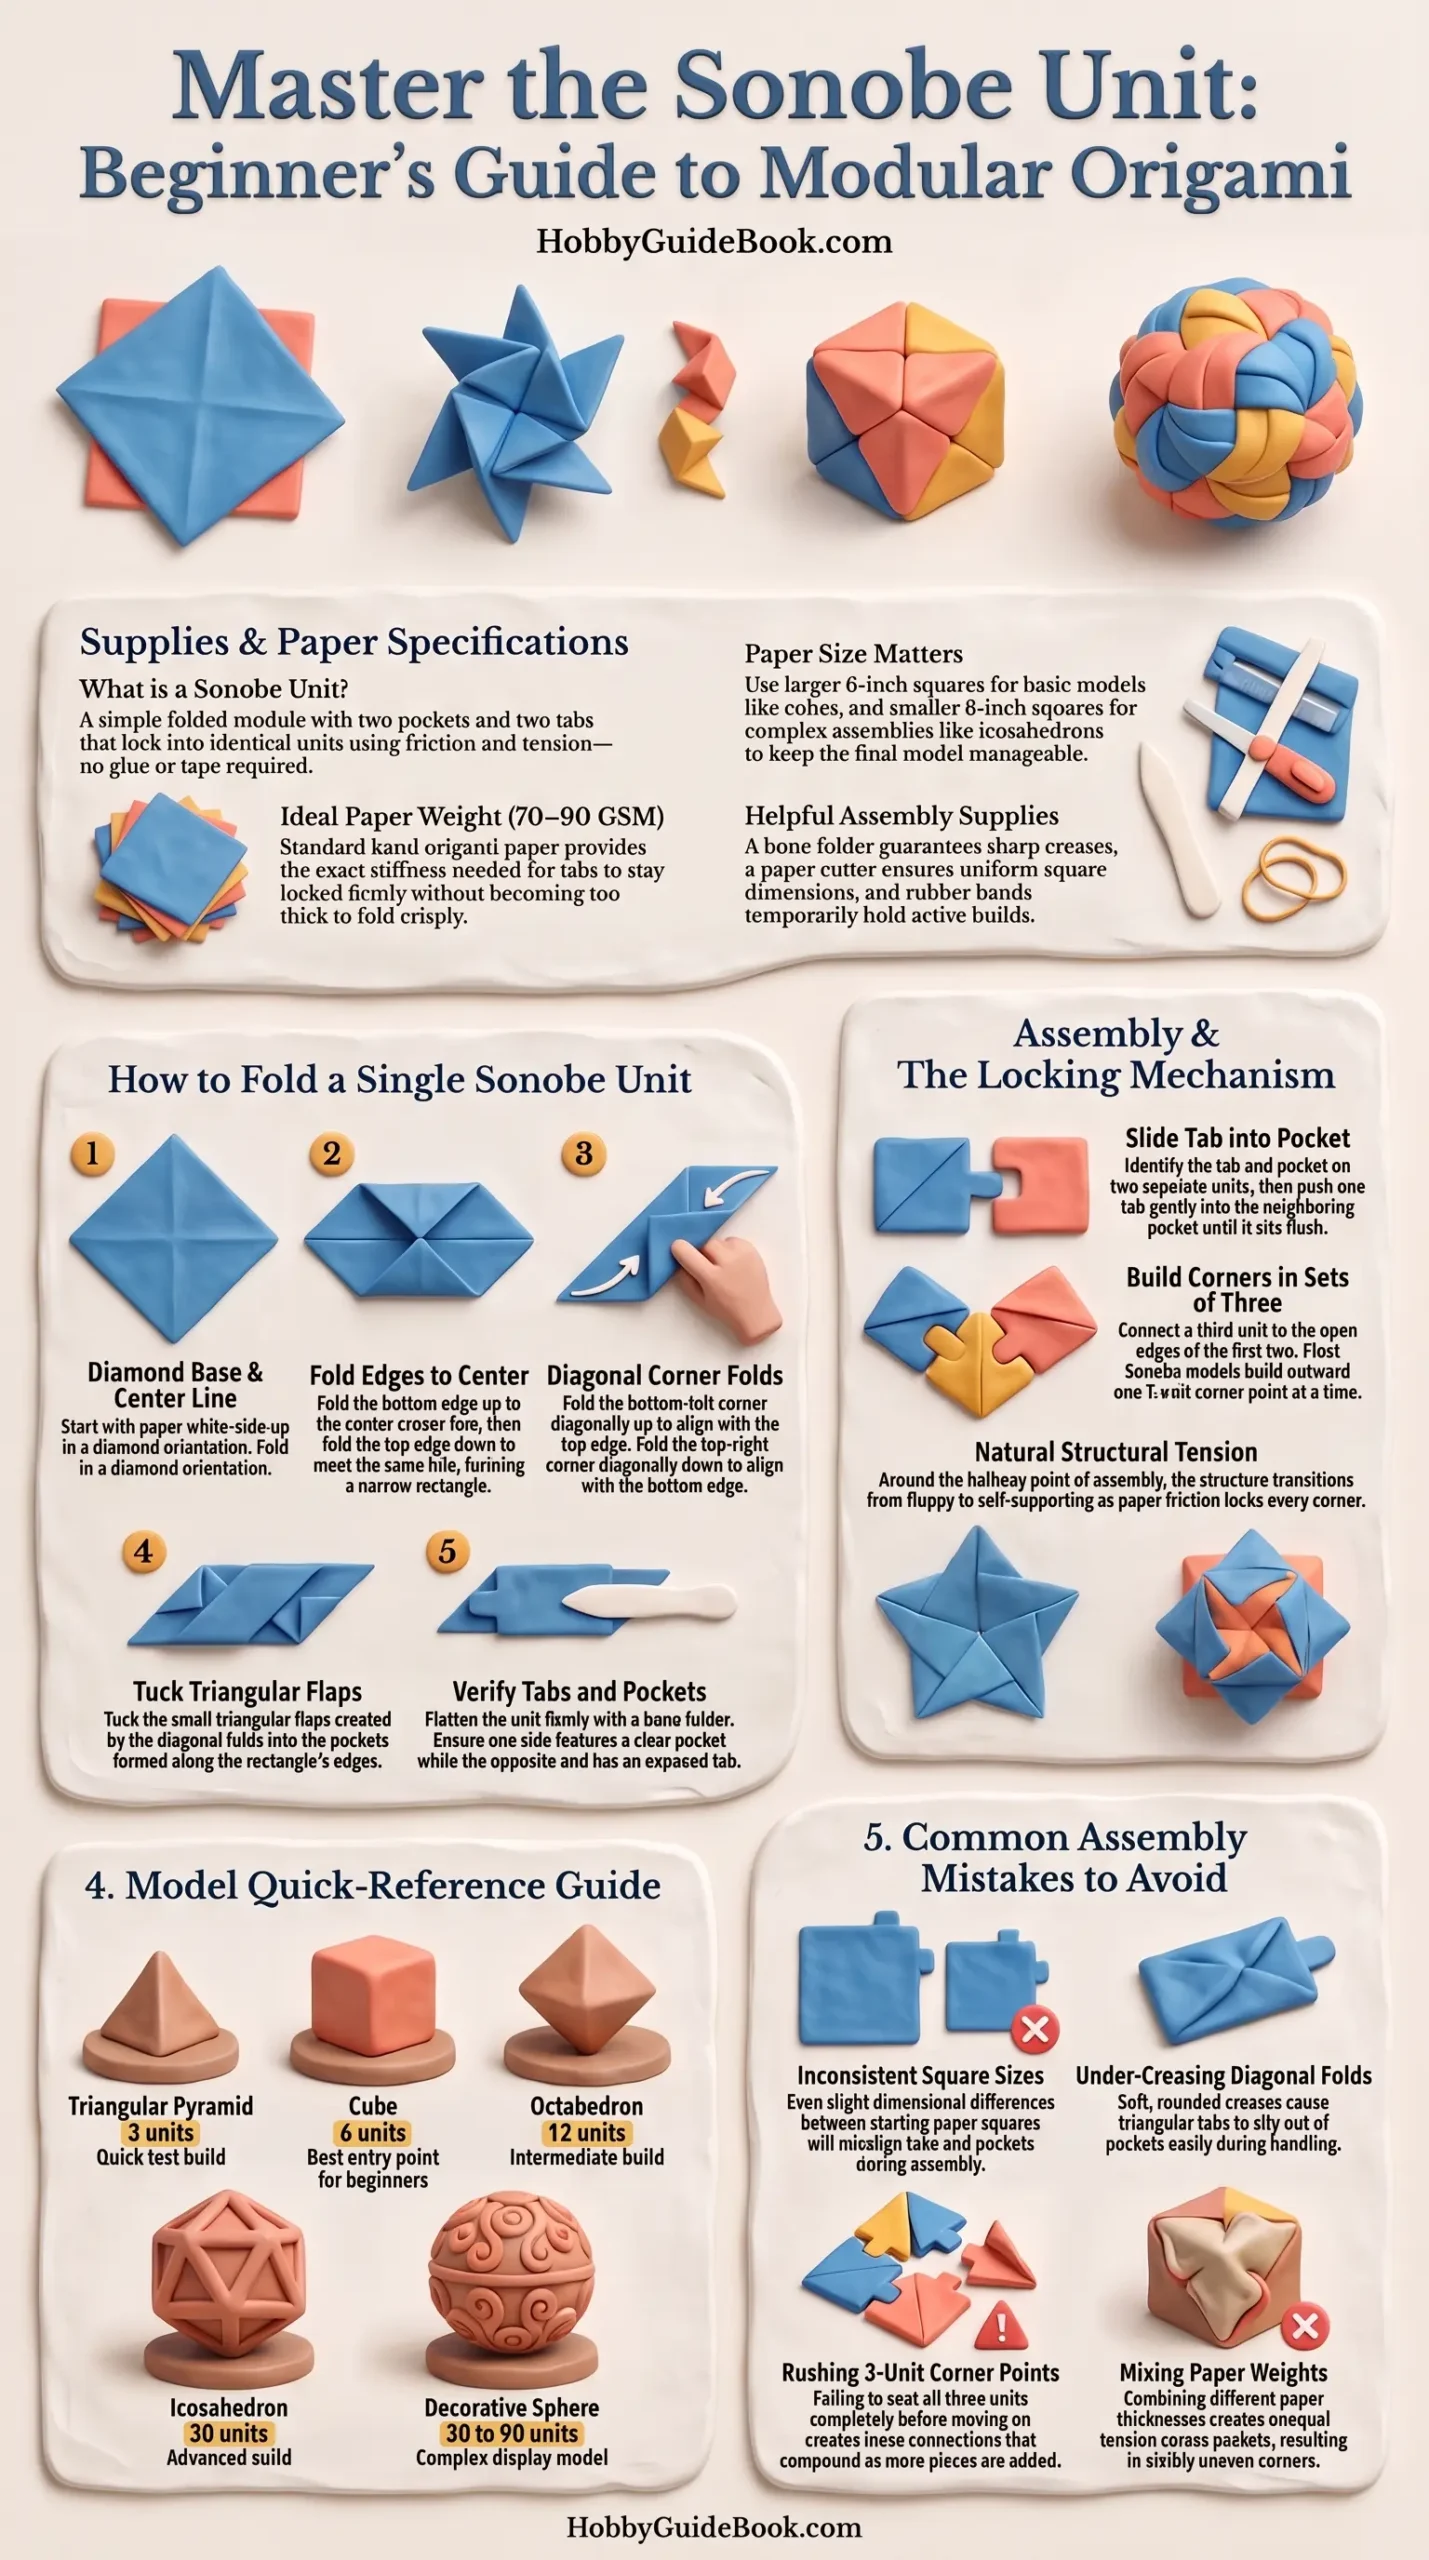
Photo Credit: Hobby Guidebook Editorial
Materials Needed for Sonobe Units
A few specific supplies make a real difference when folding and assembling multiple Sonobe units for a single model.
|
Item |
Purpose |
|
Square origami paper (kami, 70-90 gsm) |
Standard weight that folds crisply and holds tabs firmly in place |
|
Bone folder |
Creates sharp, consistent creases across every unit |
|
Paper cutter or ruler and craft knife |
Ensures each unit starts from an identically sized square or rectangle |
|
Rubber bands (a few, various sizes) |
Helps hold larger assemblies together temporarily while adding more units |
|
Storage tray or shallow box |
Keeps folded units organized and uncrushed before assembly begins |
How to Fold a Single Sonobe Unit
Each Sonobe unit starts from a square sheet of paper and follows the same basic sequence every time, which is part of why this module is so approachable once you've folded a few.
- Start with your paper white side up, positioning it as a diamond with one corner pointing toward you.
- Fold the paper in half horizontally, then unfold to leave a visible center crease line.
- Fold the bottom edge up to meet the center crease, then fold the top edge down to meet the same line, creating a narrow rectangle.
- Fold the bottom left corner up diagonally, aligning it with the top edge of your rectangle, then crease firmly.
- Repeat the diagonal fold on the top right corner, folding it down to align with the bottom edge.
- Tuck the small triangular flaps created by those diagonal folds into the pockets formed along the rectangle's edges.
- Flatten the entire unit firmly, checking that both ends show a clear pocket on one side and a tab on the other.
Repeat this same sequence for every unit your chosen model requires, keeping paper size and weight consistent across all pieces. Mixing paper weights partway through a project often causes some units to sit slightly looser or tighter than others once assembly begins.
How Do Sonobe Units Lock Together?
This is the step that trips up most beginners, not because it's technically hard, but because the pocket and tab system isn't always obvious from a diagram alone.
- Identify the tab and pocket on each unit, since every Sonobe unit has one of each along its two working edges.
- Slide one unit's tab into a second unit's pocket, pushing gently until it sits flush and doesn't slip back out on its own.
- Add a third unit, connecting its tab and pocket to the open edges of the first two units, which typically completes one corner point of the shape.
- Continue adding units in sets of three, since most Sonobe models build outward one corner point at a time rather than one unit at a time.
- Use a rubber band loosely around a partially built section if units start slipping apart during longer assembly sessions, removing it once enough units are locked in to hold shape on their own.
This locking method is what makes sonobe unit assembly genuinely satisfying once it clicks. There's a specific moment partway through a build where the shape stops feeling floppy and starts holding its form on its own, usually somewhere around the halfway point of the total unit count.

Photo Credit: Internet
How Many Sonobe Units Are Needed for Common Models?
The number of units required depends entirely on which shape you're building, and this varies more than most beginners expect.
|
Model |
Units Required |
|
Simple triangular pyramid |
3 units |
|
Cube |
6 units |
|
Octahedron |
12 units |
|
Icosahedron |
30 units |
|
Large decorative sphere |
30 to 90 units |
Starting with a cube is genuinely the best entry point if you're folding Sonobe units for the first time. Six units is enough to fully understand the locking pattern without the project dragging on too long before you see a finished result.
Can Sonobe Units Be Made Without Glue?
Yes, and this is actually one of the defining features of the Sonobe unit specifically. The tab and pocket system is designed to hold units together purely through friction and paper tension, staying true to origami's traditional no-cut, no-glue approach.
That said, some folders choose to add a small dot of glue at each connection point for models that will be handled frequently or displayed somewhere with a lot of movement. This isn't necessary for a properly folded and assembled model, but it can add extra durability for pieces meant to last years rather than months.
A modular folder I once spoke with at a paper craft meetup described the Sonobe lock as trusting the paper's memory over anything artificial, since a well-creased tab genuinely doesn't want to slip back out once it's seated correctly. That description matches my own experience, since a properly folded Sonobe sphere I built years ago is still holding its shape without a single drop of glue.
What Paper Size and Weight Work Well for Sonobe Models?
Paper choice matters more here than in many single-sheet models, since consistency across dozens of units affects how well the final shape locks together.
- Standard kami paper (70-90 gsm) works well for most Sonobe projects, offering enough stiffness to hold tabs firmly without being too thick to fold cleanly.
- Smaller squares (around 3 inches) suit larger assemblies like icosahedrons, since smaller units keep the final shape from becoming unwieldy.
- Larger squares (around 6 inches) work better for simple models like a single cube, giving you more surface area to practice clean folds.
- Avoid paper thinner than standard printer paper, since thin paper tabs tend to slip loose from pockets more easily, especially in larger assemblies where tension builds across many connections.
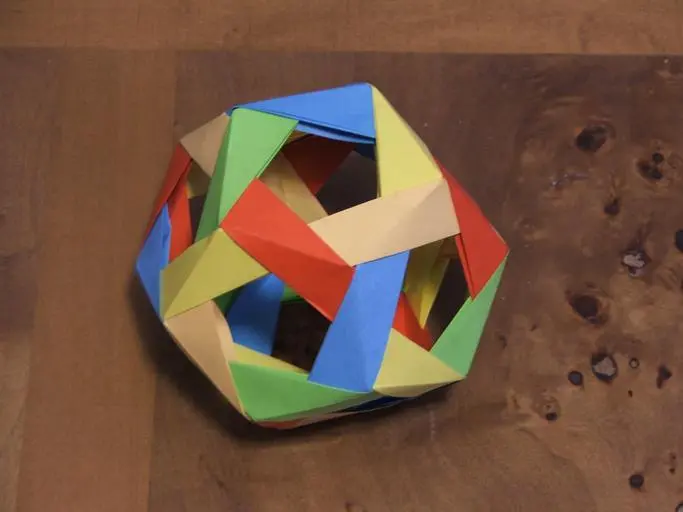
Photo Credit: Internet
If you enjoy the locking, no-glue mechanics behind Sonobe units, kusudama models use a related but distinct assembly approach worth exploring next. Kusudama Assembly Technique covers that method in detail, which shares some visual similarities with Sonobe builds but relies on a different connection style.
Common Mistakes When Building Sonobe Models
A few habits consistently slow down or weaken Sonobe assemblies for folders working through their first project.
- Cutting inconsistent square sizes. Even a small size difference between units throws off how tabs and pockets align once assembly begins.
- Under-creasing the diagonal folds. Soft creases on the triangular tabs make them slip out of pockets more easily during handling.
- Rushing the three-unit corner sections. Each corner point needs all three units seated correctly before moving on, since a loose connection early on tends to compound as more units get added.
- Mixing paper weights mid-project. Units folded from different paper weights often don't seat into pockets with the same tension, creating visibly uneven corners.
If you're still building comfort with foundational fold types before tackling a full Sonobe project, it's worth reviewing the basics first. Origami Techniques Explained covers core folding methods that make the diagonal creases in each Sonobe unit feel much more familiar going in.
What Shapes Can You Build from Sonobe Units?
Sonobe units are remarkably versatile once you understand the basic locking pattern, capable of building far more than simple cubes.
- Platonic solids, including cubes, octahedrons, and icosahedrons, all built from consistent sets of interlocking units.
- Decorative spheres and stars, often combining dozens of units into elaborate, rounded final shapes.
- Modular ornaments, popular for holiday decorating since they hold their shape well for hanging display.
- Geometric sculptures, where multiple Sonobe clusters combine into more complex, non-standard forms.
Frequently Asked Questions
What is a Sonobe unit? A Sonobe unit is a folded paper module with tabs and pockets that lock together with other identical units to build three-dimensional modular shapes without glue.
How many Sonobe units are needed for common models? A simple pyramid needs 3 units, a cube needs 6, an octahedron needs 12, and an icosahedron needs 30, with larger spheres requiring even more.
How do Sonobe units lock together? Each unit's tab slides into a neighboring unit's pocket, and units are typically added in sets of three to complete each corner point of the shape.
Can Sonobe units be made without glue? Yes, the tab and pocket design holds units together through friction and paper tension alone, though some folders add a small dot of glue for extra durability.
What paper size and weight work well for Sonobe models? Standard kami paper around 70 to 90 gsm works well, with smaller squares suited to larger assemblies and larger squares better for simple first projects.
What shapes can you build from Sonobe units? Platonic solids, decorative spheres, modular ornaments, and larger geometric sculptures can all be built from Sonobe units in varying quantities.
Final Thoughts
Sonobe units turn a simple, repeatable fold into genuinely impressive three-dimensional shapes once you understand how the pieces lock together. Start with a six-unit cube, get comfortable with the connection pattern, and larger builds will feel much less intimidating from there.
If you're ready to explore the rest of what this hobby has to offer, Read the full origami guide for everything from paper choices to techniques across every skill level.






Leave a Reply