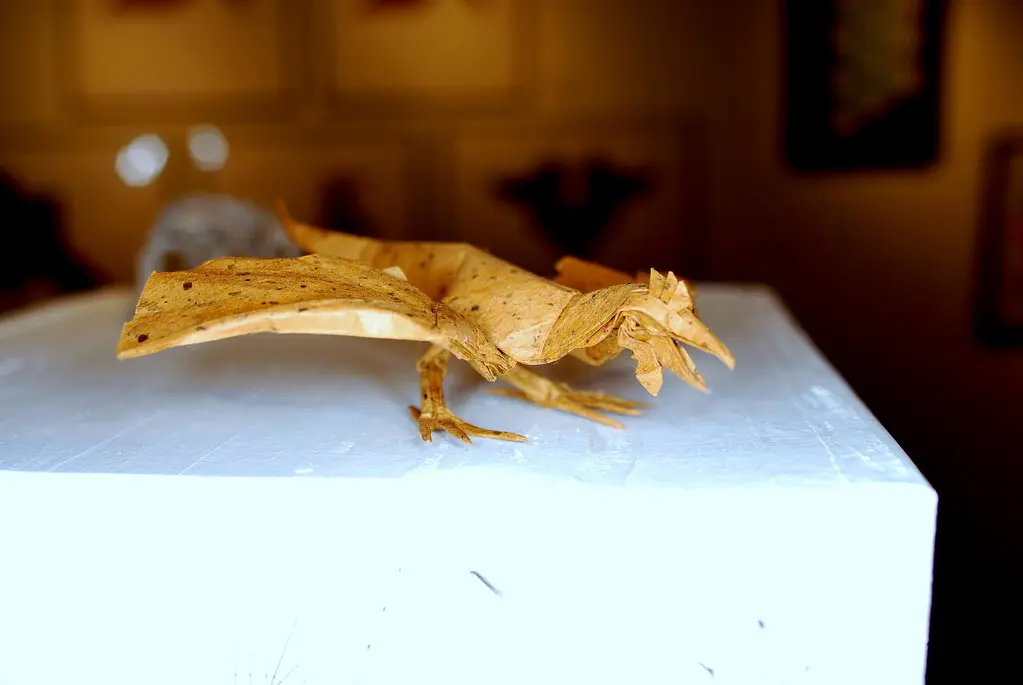
I once left a wet-folded elephant sitting near an open window overnight, woke up to find one ear had curled flat while the other held its perfect rounded shape, and learned the hard way that drying isn't something you can just walk away from. Wet-folding drying and shaping is honestly where most of the technique's real skill lives, and this guide covers exactly how to hold a model's curves in place while it sets, how long that process actually takes, and how to keep warping from ruining hours of careful folding.
This tutorial is Part of Wet-Folding Technique Explained, and it walks through realistic drying timeframes, methods for holding shape during the drying window, when reshaping is still possible, and the common causes of warping along with how to prevent it.
Why Drying and Shaping Matter So Much in Wet-Folding
Wet-folding only works because dampened paper stays flexible for a limited window before it sets permanently into whatever shape it's holding when it finally dries. That drying window is where the entire character of a wet-folded model gets locked in, curves, angles, and all.
I've found that folders who nail the paper prep stage sometimes still end up with disappointing results simply because they rush or ignore the drying phase. A perfectly dampened sheet folded into a beautiful curve can still warp, flatten, or crack if it's left to dry without support or attention.
This stage takes patience more than skill, but it's exactly the kind of patience most guides gloss over, which is why getting it right matters so much for a clean final result.

Photo Credit: Hobby Guidebook Editorial
Materials Needed for Drying and Shaping
A few supporting materials make a real difference in how evenly a wet-folded model holds its shape through the drying process.
|
Item |
Purpose |
|
Small clothespins or binder clips |
Holds curved sections in place while paper sets |
|
Cotton balls or rolled paper towel |
Provides soft internal support for rounded areas like bodies or heads |
|
Flat, non-absorbent tray |
Gives the model a stable surface that won't warp or stick as it dries |
|
Toothpicks or bamboo skewers |
Props up delicate angles like legs or wings during drying |
|
Well-ventilated, low-humidity space |
Supports even, steady drying without excess moisture lingering |
How Long Does a Wet-Folded Model Take to Dry?
Drying time depends heavily on paper weight, humidity, and how much moisture was used during preparation, so there's no single fixed number that applies to every project. As a general guideline, smaller models on lighter cardstock often dry within 2 to 4 hours, while larger or more heavily dampened pieces can take 12 to 24 hours to fully set.
Humid environments slow drying time noticeably, sometimes doubling how long a model needs before it's safe to handle without support. Dry, well-ventilated spaces speed things up, though rushing the process with direct heat sources like hair dryers or heaters is not recommended, since fast, uneven drying tends to cause warping rather than prevent it.
A simple way to check if a model is fully dry is a gentle touch test on an unsupported area. If it still feels cool or slightly flexible, it needs more time before you remove any supports holding its shape.
How Do You Hold a Model in Shape While It Dries?
This is where most of the actual shaping wet-folded origami work happens, since the model's final form depends entirely on what's supporting it during the drying window.
- Shape the model fully while the paper is still damp, pressing curves and angles into place with your fingers before introducing any external supports.
- Use small clips at stress points, like where a neck bends or a wing angles away from the body, holding those sections firmly without crushing the paper.
- Stuff rounded areas gently with cotton balls or rolled paper towel, giving hollow curved sections internal support so they don't collapse inward as they dry.
- Prop thin or delicate sections with toothpicks, supporting legs, tails, or beaks that might droop under their own weight before the paper sets.
- Place the model on a stable, flat surface, avoiding any spot where the piece might shift or roll during the drying period.
- Check the model every few hours, adjusting supports if you notice any section starting to sag or lose its intended curve.
- Leave supports in place until the paper feels completely dry to the touch, resisting the temptation to remove them early just because the model looks finished.
Photo Credit: https://kaboompics.com/
Getting comfortable with this shaping stage really connects back to how the paper was prepared in the first place. Wet-Folding Paper Preparation covers the dampening process that determines how much flexibility you'll have to work with once you reach this shaping step.
Can You Reshape a Wet-Folded Model During Drying?
Yes, but only within a specific window, and that window closes faster than most beginners expect. While the paper still feels cool and slightly flexible, gentle reshaping is usually possible, carefully adjusting a curve or angle that isn't sitting quite right.
Once the paper starts feeling stiff and dry to the touch, forcing a reshape at that point risks cracking the paper fibers rather than smoothly adjusting the curve. If a section looks wrong after the model has fully dried, very lightly remisting just that area with a fine spray can sometimes restore enough flexibility for a small correction, though this doesn't always work as well as getting the shape right the first time.
A wet-folding artist I once spoke with at a paper craft demonstration described the reshaping window as a closing door rather than a locked one, since there's real flexibility early on that narrows steadily as drying progresses. That description has stuck with me, since checking a model's shape within the first hour of drying gives far more room to correct mistakes than waiting until the next day.
Why Can Wet-Folded Models Warp While Drying?
Warping happens when different areas of a model dry at different rates, causing the paper to pull unevenly as it shrinks slightly during the drying process. Thicker or more heavily dampened sections often dry slower than thinner areas, and that mismatch in drying speed is usually what causes visible curling or twisting.
Uneven support is another major cause of warping. A section left unsupported while paper is still damp tends to sag under its own weight, and once that sagged position sets, it's difficult to correct without remoistening and reshaping.
Environmental factors play a role too, since a model drying near a window with direct sunlight on one side often warps toward the shaded side, as moisture leaves the sunny side faster than the rest of the piece.
If you're still building comfort with the fold types wet-folding relies on before tackling a full drying and shaping project, it helps to review the basics first. Origami Techniques Explained covers foundational folds that make understanding how paper moves and holds shape much more intuitive.
How Can You Reduce Warping During Drying?
A few consistent habits noticeably cut down on warping across most wet-folded projects.
- Dry the model in a stable, draft-free spot. Avoid windowsills, vents, or anywhere airflow hits one side of the piece more than the other.
- Support every curved section, not just the obvious ones. Even small unsupported areas can sag enough to throw off the model's overall symmetry.
- Rotate the model occasionally during longer drying periods. This helps expose all sides to similar airflow rather than letting one side dry noticeably faster.
- Avoid direct heat sources entirely. Fast drying from a heater or hair dryer almost always increases warping rather than preventing it, since it dries the surface faster than the interior fibers.
- Keep supports snug but not tight. Overly tight clips can leave permanent indentation marks in paper that's still soft from moisture.
Photo Credit: Anna Danilina
Comparing Early Stage and Late Stage Drying
|
Factor |
Early Drying (0-2 hours) |
Late Drying (12+ hours) |
|
Paper flexibility |
High, gentle reshaping possible |
Low, mostly set in place |
|
Warping risk |
Moderate, shape not yet locked |
Low, shape has stabilized |
|
Handling caution |
Can adjust supports carefully |
Avoid moving or bending |
|
Best action |
Fine-tune curves and angles |
Leave completely undisturbed |
Frequently Asked Questions
How long does a wet-folded model take to dry? Small models often dry within 2 to 4 hours, while larger or more heavily dampened pieces can take 12 to 24 hours depending on humidity and paper weight.
How do you hold a model in shape while it dries? Small clips, cotton ball supports, and toothpicks all help hold curves and angles in place until the paper sets fully on its own.
Can you reshape a wet-folded model during drying? Yes, gentle reshaping works well early in the drying process while paper still feels cool and flexible, but becomes risky once the paper stiffens.
Why can wet-folded models warp while drying? Uneven drying speed between sections, unsupported curves sagging under their own weight, and inconsistent airflow all commonly cause warping.
How can you reduce warping during drying? Dry models in a stable, draft-free spot, support all curved sections evenly, avoid direct heat, and rotate the piece occasionally during longer drying periods.
Final Thoughts
Drying and shaping is the quiet, patient half of wet-folding that determines whether all that careful dampening and folding actually pays off. Support the curves that matter, resist the urge to rush, and check in occasionally rather than constantly, and your finished model will hold the shape you worked to create.
If you're ready to explore the rest of what this hobby has to offer, Read the full origami guide for everything from paper choices to techniques across every skill level.





Leave a Reply