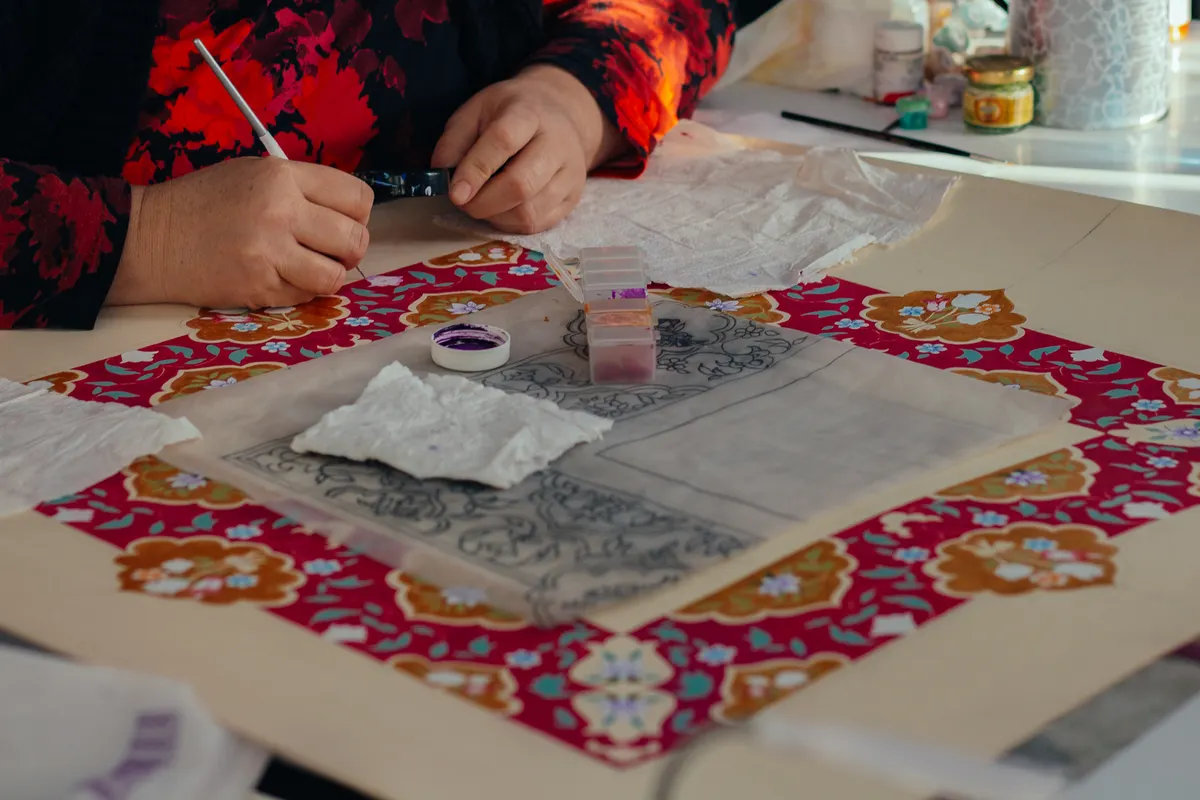
That pretty paper napkin sitting in your kitchen drawer, the one too nice to actually use for dinner, is exactly the material behind one of the easiest paper crafts around. A good napkin decoupage technique turns a thin, printed napkin into a permanent design on wood, glass, or ceramic, and it takes far less skill than most people expect.
Decoupage with napkins works because the paper is so thin it becomes almost invisible once glued down, leaving only the printed pattern behind. This article is Part of Decoupage Techniques, so once napkin work feels comfortable, the rest of decoupage builds naturally from here.
Why Napkins Work So Well for Decoupage
Paper napkins are printed with the same kind of tissue paper used in gift wrapping, just folded into layers. That thinness is exactly what makes them ideal for decoupage, since a thin printed layer blends into a surface far more smoothly than thicker paper ever could.
Decoupage with napkins has become one of the most popular entry points into paper crafting because the material is cheap, widely available, and forgiving of small mistakes. I've turned plain wooden boxes, glass jars, and even old furniture drawers into finished pieces using nothing more than napkins from the grocery store and basic glue.
The catch is that napkins tear easily and wrinkle if handled roughly, so technique matters more here than with sturdier paper. Once you understand a few key steps, though, those problems mostly disappear.
Tools and Materials for Napkin Decoupage
You don't need specialty craft supplies to get started, though a few specific items make the process much smoother.
|
Tool or Material |
Purpose |
|
Printed paper napkins |
The decorative top layer applied to your surface |
|
Decoupage glue (like Mod Podge) |
Bonds the napkin to the surface and seals it |
|
Soft craft brush |
Applies glue smoothly without pushing wrinkles |
|
Scissors |
Trims napkin sections to size |
|
Cardstock or scrap paper |
Used underneath for tracing or cutting templates |
|
Clean, prepared surface |
Wood, glass, or ceramic ready for the napkin layer |
A soft, wide brush makes a noticeable difference compared to a stiff one. Stiff bristles tend to drag the delicate napkin layer and create small tears, especially near the edges.
Do You Need to Separate Napkin Layers for Decoupage
Yes, and this step trips up more beginners than almost anything else in the process. Most printed napkins have two or three layers, but only the top layer carries the printed design. The layers beneath are plain white and add unnecessary bulk.
Gently peel the layers apart before you begin gluing anything down. It's easier than it sounds, most napkins separate cleanly if you start from a corner and pull slowly rather than all at once.
Skipping this step is one of the most common napkin decoupage mistakes I see. Gluing down all the layers together creates a thick, cloudy finish that hides the pattern instead of showing it clearly.
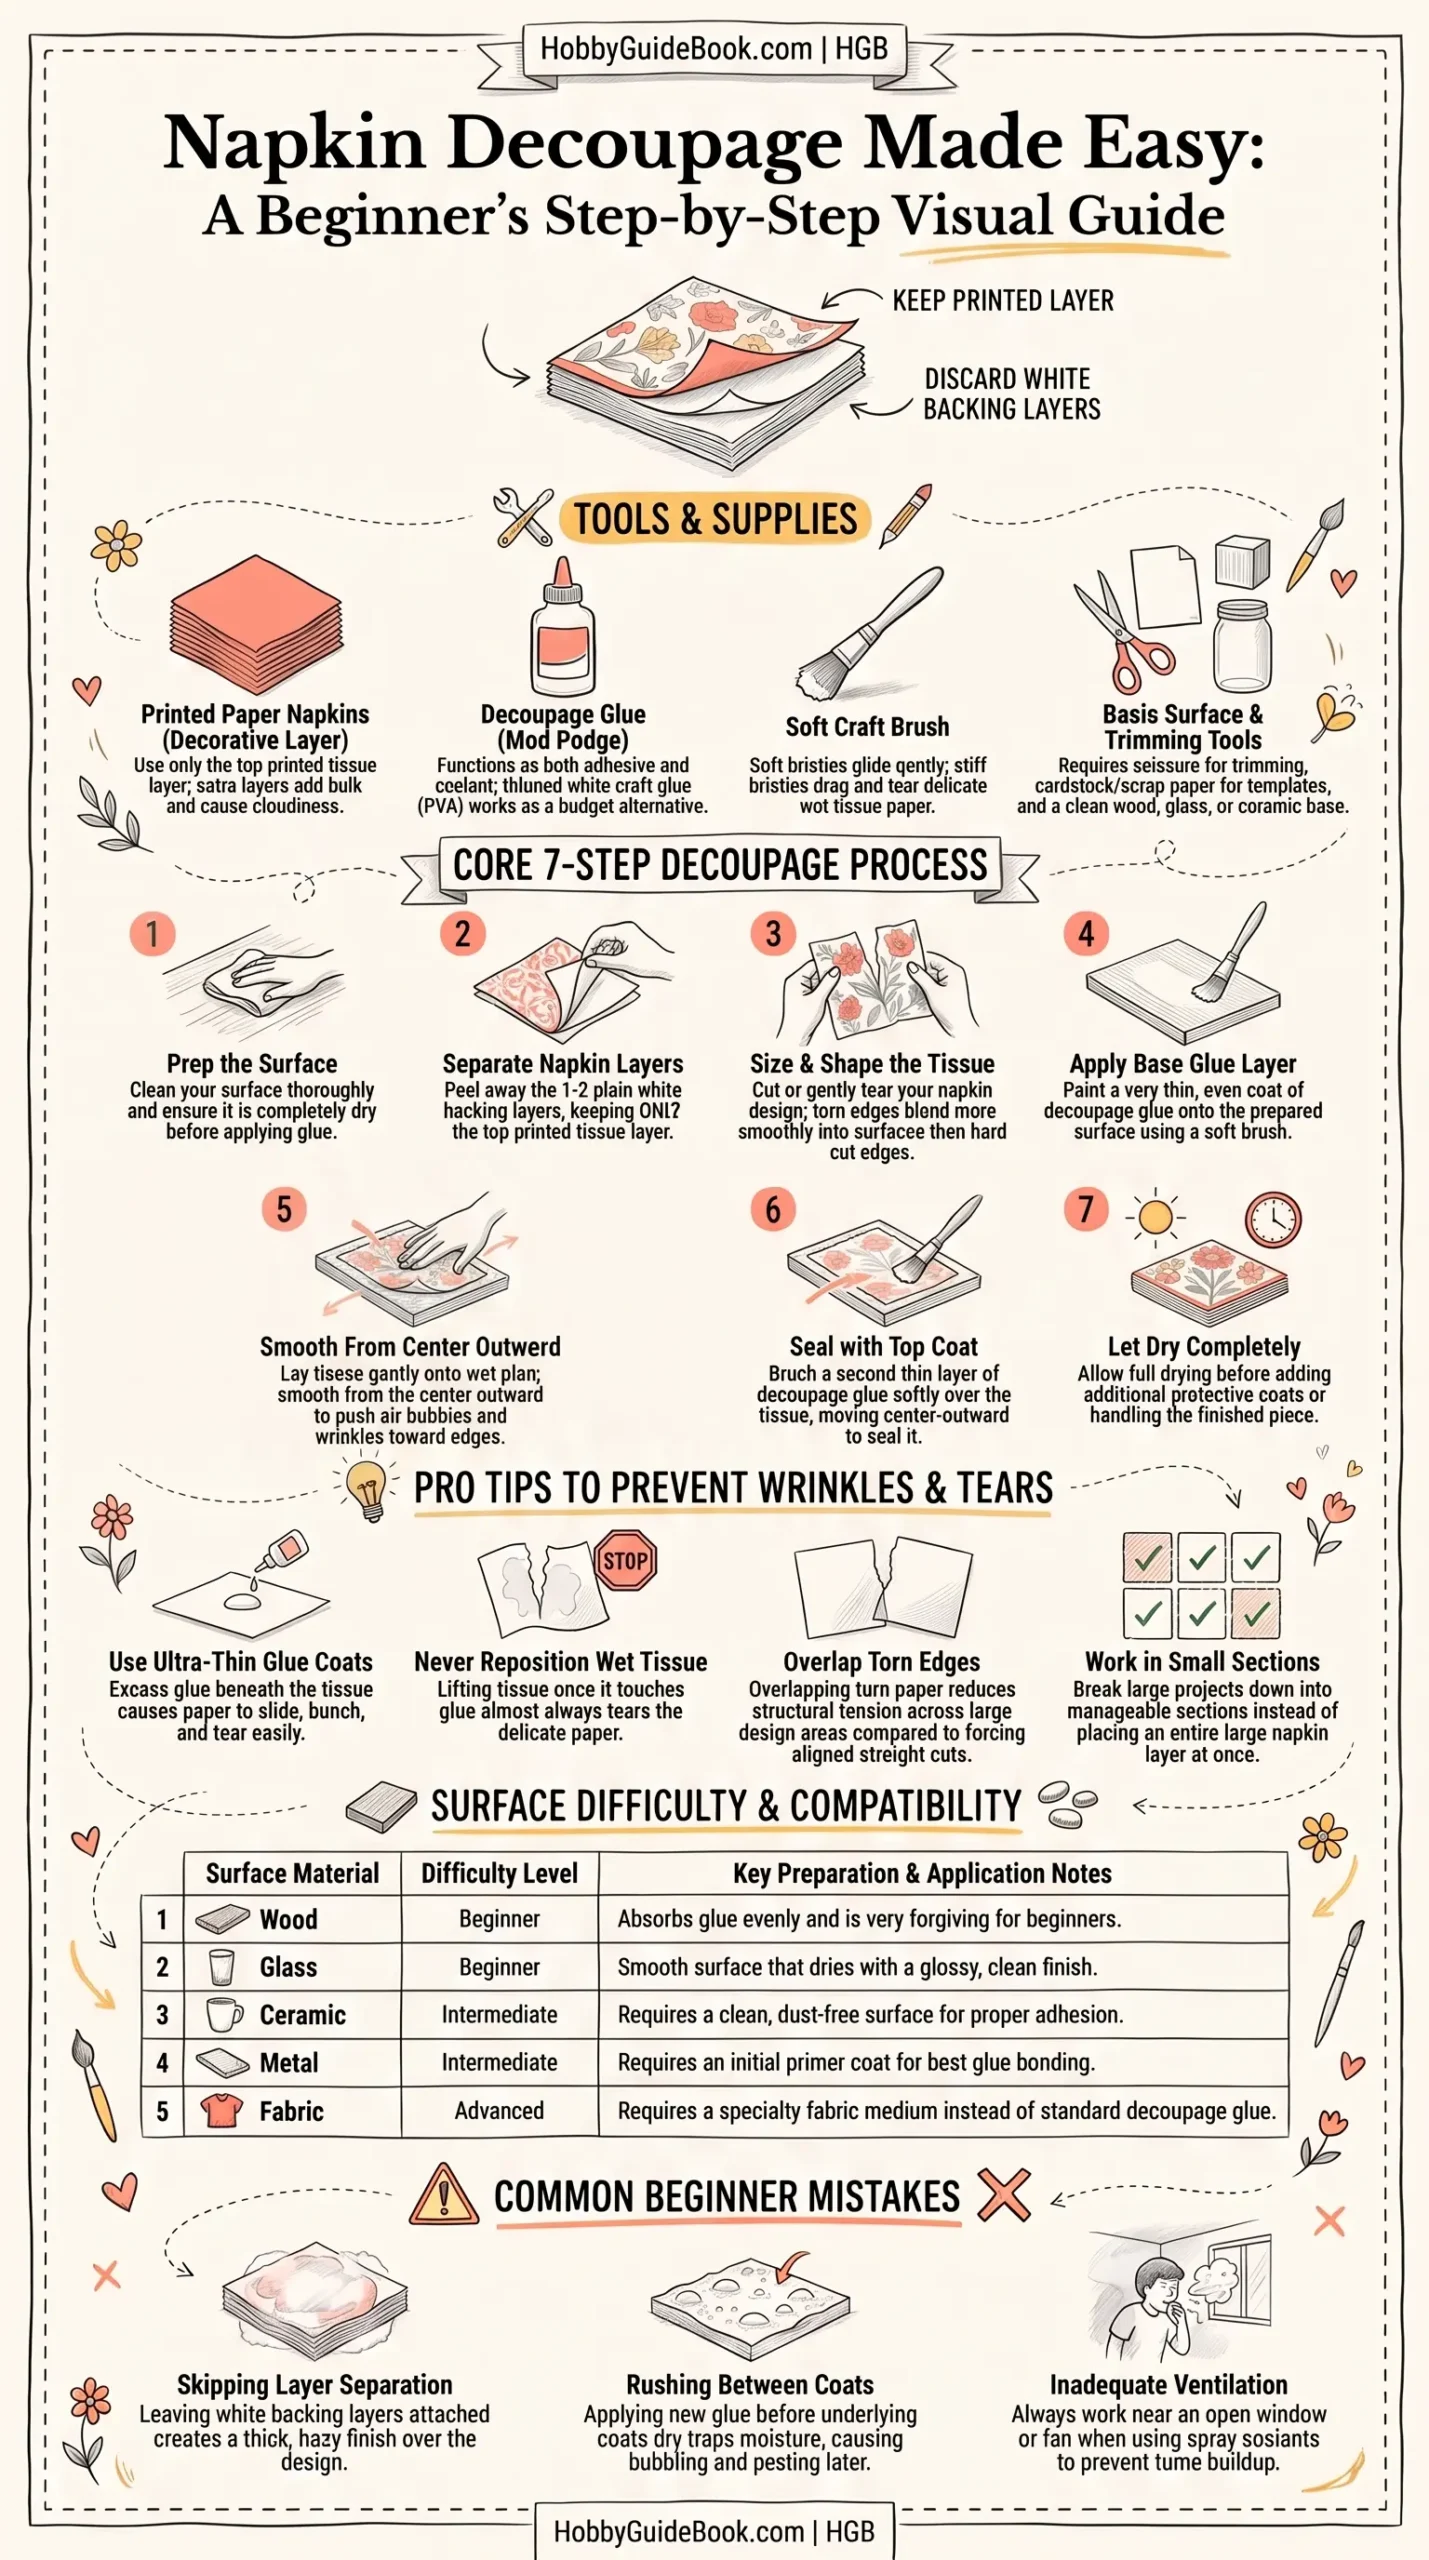
Photo Credit: Hobby Guidebook Editorial
Core Technique: How to Decoupage with Paper Napkins
Once your napkin is separated and your surface is ready, the actual gluing process moves fairly quickly.
- Prepare your surface by cleaning it and making sure it's completely dry before starting.
- Separate the printed layer from the plain layers underneath, working slowly to avoid tearing.
- Tear or cut your napkin section to roughly the size and shape you need, since torn edges often blend more smoothly than cut ones.
- Apply a thin layer of decoupage glue to the surface using your soft brush.
- Lay the napkin down gently, starting from the center and smoothing outward rather than pressing from one edge across.
- Brush a second thin layer of glue over the top, working outward in soft strokes to seal the napkin in place.
- Let the piece dry fully before adding additional layers or a final protective coat.
Working from the center outward is the single biggest trick here. It pushes air bubbles and small wrinkles toward the edges instead of trapping them underneath the design.
Once that final glue coat has dried, the surface still needs proper protection to hold up over time. Decoupage Sealing & Varnishing covers how to build up those protective layers without clouding the pattern you just spent time smoothing into place.
How to Prevent Wrinkles When Applying a Napkin
Wrinkles are the most common frustration with napkin decoupage, but they're almost always caused by one of a few specific habits.
A few adjustments that fix most wrinkle problems:
- Use a very thin layer of glue underneath the napkin, since too much glue makes the paper slide and bunch instead of sitting flat.
- Work from the center outward, smoothing gently with your fingertip or a soft brush rather than pressing hard in one spot.
- Avoid repositioning the napkin once it touches the glue, since lifting and replacing it almost always causes tearing or wrinkling.
- Let torn edges overlap slightly rather than forcing a precise cut edge to align, which reduces tension across the napkin.
- Work in small sections on larger projects instead of trying to place one large napkin piece all at once.
A wrinkle caught in the first thirty seconds is easy to smooth out. Once the glue starts setting, trying to fix it usually tears the napkin instead of fixing the problem.
Photo Credit: Ron Lach
What Glue Is Best for Napkin Decoupage
Dedicated decoupage glue, often sold under names like Mod Podge, is the most reliable choice for napkin work. It's formulated to act as both the adhesive and the sealant, which matters since napkins are too thin to handle a separate glue and varnish step without tearing.
A basic white craft glue (PVA glue) thinned slightly with water works as a budget alternative, though it dries less evenly and can leave a slightly tackier finish. For most beginners, a dedicated decoupage glue is worth the extra cost simply because it removes one more variable while you're still learning the technique.
What Surfaces Work Best for Napkin Decoupage
Napkin decoupage adapts well to a wide range of surfaces, though some hold the design better than others.
|
Surface |
Difficulty |
Notes |
|
Wood |
Beginner |
Absorbs glue evenly, very forgiving |
|
Glass |
Beginner |
Smooth surface, dries with a glossy look |
|
Ceramic |
Intermediate |
Needs a clean, dust-free surface to bond well |
|
Metal |
Intermediate |
Requires a primer coat for best adhesion |
|
Fabric |
Advanced |
Needs a specialty fabric medium instead of standard glue |
Wood and glass are the easiest starting points since both hold glue evenly and forgive small technique mistakes. Ceramic and metal work well too, but they usually need a bit more surface preparation before the napkin goes on.
Wood surfaces in particular open the door to larger furniture projects once small pieces feel comfortable. Decoupage on Wood & Furniture walks through scaling this same technique up to drawers, boxes, and tabletops.

Photo Credit: Wolf Art
Common Napkin Decoupage Mistakes to Avoid
A handful of habits separate a clean, professional looking finish from a cloudy or wrinkled one.
- Skipping the layer separation step, which leaves a thick, hazy finish over the printed design.
- Applying too much glue at once, causing the thin napkin to slide, stretch, or tear.
- Rushing between coats, which traps moisture and leads to bubbling or peeling later.
- Working in a rush overall, since napkin decoupage rewards patience more than almost any other paper craft.
- Skipping proper ventilation, especially when using spray sealants indoors. Working near an open window or fan keeps fumes from building up while coats dry.
FAQ
How do you decoupage with paper napkins? Separate the printed top layer from the plain layers underneath, apply a thin coat of decoupage glue to your surface, lay the napkin down from the center outward, then seal it with another thin coat of glue.
Do you need to separate napkin layers for decoupage? Yes, most napkins have two or three layers, but only the top layer carries the print. Gluing all the layers together creates a thick, cloudy finish instead of a clean one.
What glue is best for napkin decoupage? A dedicated decoupage glue like Mod Podge works best, since it acts as both adhesive and sealant. Thinned white craft glue works as a budget alternative.
How do you prevent wrinkles when applying a napkin? Use a thin layer of glue, smooth the napkin from the center outward, avoid repositioning it once it touches the glue, and work in small sections on larger projects.
What surfaces work best for napkin decoupage? Wood and glass are the easiest surfaces for beginners, while ceramic and metal work well too once the surface is properly cleaned or primed.
Final Thoughts
The napkin decoupage technique comes down to a few careful habits: separating layers, using thin coats of glue, and working from the center outward to avoid wrinkles. Once those steps feel natural, almost any surface becomes a project waiting to happen.
Read the full paper crafts guide for a wider look at techniques across decoupage and every other paper craft.


Leave a Reply